

In the captivating universe of AI Limit, Seals function analogously to Medallions found in the Souls series, providing essential buffs that enhance the abilities of the Blader. Mastering the use of these enhancements is crucial for gaining a competitive edge in the game’s challenging sci-fi realm. However, the mechanics for utilizing these Seals require careful preparation and understanding to function seamlessly.
This comprehensive guide will walk you through everything you need to know about Seals in AI Limit.
Understanding Seals in AI Limit

Seals are specialized items or badges that can be equipped by players to unlock various buffs. Each Seal offers a unique effect that can significantly influence gameplay. However, players must note that these Seals aren’t available from the outset; they are to be earned through exploration and achievement.
Equipping and Modifying Seals
Once you’ve navigated through the initial area of the game, your journey will lead you to the Outer-Wall Ruins. Upon reaching the third branch of the game, known as Abandoned Houses—AI Limit’s version of bonfires—descend two ladders to locate a nearby house with a kneeling enemy by the door. Inside, you will discover an item called Seal Needle.
After acquiring the Needle, a new interaction option will become available at the branch, allowing you to rewrite or modify your Seals. This feature enables you to equip both primary and secondary badges, with the added capability to upgrade them at any branch.
To enhance your Seals, navigate to the Enhance menu and use the D-pad to access the “Seals”section, where you can perform upgrades as needed.
Overview of Seals in AI Limit

In total, there are seven main Seals and 44 normal Seals within the game. Main Seals are generally obtained by completing specific in-game objectives, whereas normal Seals can be found throughout the expansive game world.
Main Seals and Their Locations
Here’s a quick reference for the main Seals in AI Limit and how to unlock them:
- Seal of the Newborn: Acquired right from the beginning of the game.
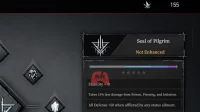
- Seal of the Pilgrim: Talk to Shirley at the Temporary Campsite Branch in Outer-Wall Ruins three times.
- Standard Seal of Bladers: Speak to Feylia at the Lounge Branch in the Sunken City Overground.
- Seal of Investigator: Purchase from Millair (located at the Flooded Street, High Street Branch) for seven Adaptive Fragments and 4000 Crystals.
- Seal of Executor: Defeated from the boss Necro, the Wanderer of Undersea, in the Underground Parish of Sunken City Underground.
- Seal of the Tree: Interact with the memory near the Sewer Town Center Gate at the Tree Branch.
- Seal of Clergies: Start at the Faultage Corridor Branch in Hagios Paltir, ascend to the upper floor, and retrieve the Seal from a chest near two ranged enemies.
Normal Seals Available in the Game
Throughout your adventures in AI Limit, you’ll encounter the following normal Seals:
- Breath of Life
- Tide of Life
- Torrent of Life
- Metastability
- Stability
- Hyperstability
- Sand Accumulator
- Stone Builder
- Gold Hoarder
- Hardened Skin
- Steel Shell
- Divine Guardian
- Drizzle
- Quagmire
- Submerged Coffin
- Inertia Transformation
- Neutral Transformation
- Insulation Transformation
- Brief Polymerization
- Precipitation
- Jade Form
- Emerald Form
- Moon Dew
- Moon Radiance
- Cleansing Therapy
- Harsh Voice
- Ethereal Tone
- Deadwood Form
- Monolith Form
- Burst
- Collapse
- Slayer
- Tyrant
- Ingestion
- Gluttony
- Conversion
- Deviation
- Variation
- Scattered Stars
- Everlasting Piercing
- Fortified Shield
- Thunder Mastery
- Gush
- Nova
Arming yourself with the right Seals can greatly enhance your gameplay experience in AI Limit. Equip wisely and explore thoroughly to harness their full potential!