
As players venture through The Talos Principle: Reawakened, they will quickly familiarize themselves with the first-person puzzle mechanics by the time they reach Door 2 in World A. While this area introduces only two green sigils, the complexity of the puzzles far exceeds that of Door 1.
In this phase, players will still utilize familiar items such as Jammers, bombs, barriers, and mounted guns. However, their application will become significantly more strategic. A notable yellow sigil can also be collected, which plays a crucial role in unlocking the Connector object for future puzzles, leading to increasingly intricate puzzle designs.
Guide to Solving Hall of Windows in The Talos Principle: Reawakened


Upon entering the Hall of Windows puzzle room, take the first left and continue down the road until you spot a Jammer. Do not pick it up immediately; instead, navigate through the purple barrier to the left. This area contains a second Jammer and some windows. Utilize the second Jammer to disable the blue barrier visible from the right window.
Once the blue barrier is down, take the first Jammer past it, targeting yet another already disabled barrier to gain access. Afterward, return to Jammer 2 and carry it to the window adjacent to the purple barrier, where another distant blue barrier can be disabled using Jammer 2.
Retrieve Jammer 2 again, then turn right to find another blue barrier. Disable it with Jammer 2, then proceed through the opening, following the path until you encounter the green sigil on your first left.
Guide to Solving The Guards Must Be Crazy in The Talos Principle: Reawakened


Upon entering this puzzle area, take the immediate left; however, exercise caution as a bomb bounces between the wall and a Jammer. Grab the Jammer and exit the room. Proceed deeper into the puzzle, where another bomb awaits. Use your Jammer to disable this bomb, then continue along the path to locate Jammer 2.
From a safe distance, use Jammer 2 on the bomb, then transport Jammer 1 to Jammer 2’s location. You will observe a barrier; disable it with Jammer 1 and wait for the bomb to pass through the now-disabled barrier. With the coast clear, take Jammer 2 and use it to deactivate the barrier on the opposite side of the bomb’s path, granting access to the room containing the green sigil.
Players should take their time and maintain a strategic approach, as there is ample space in between the bombs to thoroughly solve the puzzle without needing a co-op partner.
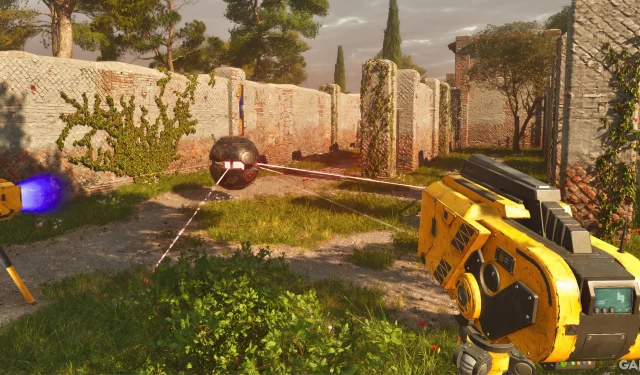
Guide to Solving Suicide Mission in The Talos Principle: Reawakened


Upon entering the Suicide Mission puzzle room, proceed to follow the left wall until you encounter a Jammer. Deploy this Jammer to disable the mounted gun that is aimed at the blue barrier. A switch is located next to this barrier; activate it and then use the Jammer on the barrier itself.
The game does a commendable job of gradually revealing its mechanics; the more familiar you become with the environment, the more you will learn, such as utilizing bombs strategically to eliminate mounted threats.
As a bomb moves towards the mounted gun, it will destroy it. Continue along the path beyond the barrier, and you will discover the yellow sigil waiting for you.