

The Talos Principle: Reawakened invites players to embark on an intellectual journey filled with complex puzzles and symbolic sigils. From the outset, players primarily encounter green sigils, but as they explore further, they’ll realize the significance of various colors, each crucial for progressing through the game. Notably, players can expect to find their inaugural red sigil in World A3.
In World A3, gamers will discover a total of four sigils: one green sigil, two yellow sigils, and their first red sigil. Additionally, there are two Stars scattered throughout the world, but gathering these Stars can be postponed, as some may prove particularly challenging to acquire.
Strategies for “Stashed for Later”in The Talos Principle: Reawakened

The vast landscapes of The Talos Principle are punctuated with intricate puzzles. At the beginning of each world, players can spot a sign detailing the number of puzzles available and directional indicators towards them. After solving a puzzle, an X will mark its completion.
Upon entering the designated puzzle room, veer left along the path. Here, you’ll encounter a bomb influenced by a Jammer. Keep proceeding down this path until a fork appears; take the left route to discover some keys. Return to the fork and trace the left wall to locate the gate that corresponds with the keys.
This sequence will lead you to a room housing Jammer 2. Be cautious: the nearby Jammer associated with the bomb is too close, and attempting to grab it will trigger an explosion. Instead, use Jammer 2 to safely disable the bomb, then retrieve Jammer 1.
Return to the fork and take the left path again towards an opening in the wall. Utilize both Jammers in this opening to disarm the two mounted guns ahead. Nestled between these defenses lies the green sigil.
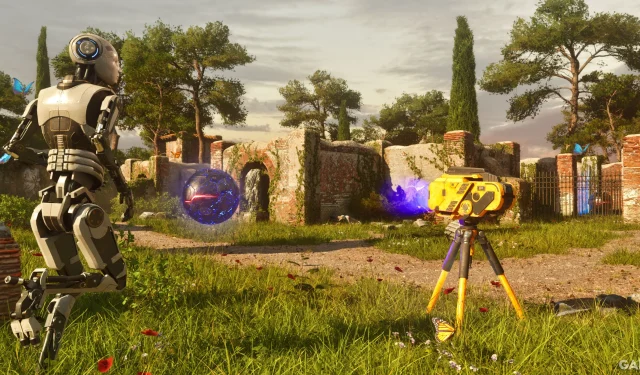
Although The Talos Principle: Reawakened is not a horror game, unexpected explosions, such as those from the bombs, can deliver quite a shock to players!
Solutions for “A Bit Tied Up”in The Talos Principle: Reawakened

The puzzle “A Bit Tied Up”often feels reminiscent of an escape room challenge. Upon entering, check the left side for a Jammer. Take this weapon and turn around to notice a blue barrier with a path alongside it. At the end of this path, you’ll find two additional Jammers and a disabled bomb. Jammer 2 is temporarily deactivating a bomb, while Jammer 3 is nullifying a mounted gun.
Employ Jammer 1 on the bomb, then take Jammer 2 to partner with Jammer 1. Use Jammer 2 to nullify the mounted gun, then bring Jammer 3 to Jammer 1. This sequence allows you to disable the blue barrier using any of the Jammers, facilitating access with the other two Jammers. After passing through the previous barrier, disable the left-side mounted gun with one Jammer and deal with the right-side gun using the remaining Jammer.
Progress along the path to find the yellow sigil. Completing puzzles like this will sharpen players’ reasoning skills, preparing them for more complex encounters in The Talos Principle.
If you’re astute, you can also employ a Jammer to disable another barrier within the room, thus allowing access to a hidden Star.
Addressing “Locked Me Up, Swallowed the Key”in The Talos Principle: Reawakened

To tackle the “Locked Me Up, Swallowed the Key”puzzle, follow the main path ahead and take your first right, then quickly turn left to find a Jammer. Once you have it, backtrack along your route, heading right again to reach a blue barrier. Proceed through this barrier and make a left turn for the keys.
Return to the open barrier and spot Barrier 2 to your left. Utilize the Jammer to clear the path ahead, where you’ll encounter a mounted gun at the end. Deactivate this gun with your Jammer, after which you’ll find Jammer 2 in its line of sight.
Utilize Jammer 2 to clear Barrier 2. Now, take Jammer 1 with you through Barrier 2, where another mounted gun awaits. Proceed to disable this gun with Jammer 1, then use Jammer 2 on yet another mounted gun situated beyond Barrier 2. Continue along this path to claim your yellow sigil.
Resolving “An Escalating Problem”in The Talos Principle: Reawakened

Engaging with puzzles from a first-person view can be daunting; however, the structure of this specific challenge features diverse elevations, aiding in strategic planning. This puzzle marks the players’ initial opportunity to acquire a red sigil and is regarded as one of the toughest in World A3.
Upon entering the puzzle area, follow the left wall until reaching a blue barrier. Not far from here, a Jammer rests on a ledge, while a bomb circles between these two items, occasionally changing direction. Don’t worry if you’re caught off guard — just rewind briefly.
Retrieve the Jammer from the ledge and turn left towards Barrier 2, which is paired with a staircase. Use the Jammer to disable Barrier 2, allowing passage and leading to the ledge where you initially spotted the Jammer. Look down to collect it once more.
Continue up the stairs, past Barrier 2, until you reach Barrier 3. Utilize the Jammer to render it inactive, resulting in an area filled with two floating bombs and keys in the center. It’s essential to survey the surroundings beforehand, as there is no co-op partner to aid in puzzle-solving. Retrieve the keys and return to the Jammer, as you’ll discover the gate needing these keys further up the stairs past Barrier 2.
After using the Jammer on Barrier 2, allow the bomb to drift past. Follow it until it crosses through the gate, then disable the barrier beyond the gate using your Jammer. This will lead the bomb to explode the mounted gun waiting at the pathway’s end, where you’ll spot the coveted red sigil resting along the left ledge.
For complete guidance on all puzzles in World A3, refer to the source.