
Casterfell Dam: A Crucial Location in Atomfall
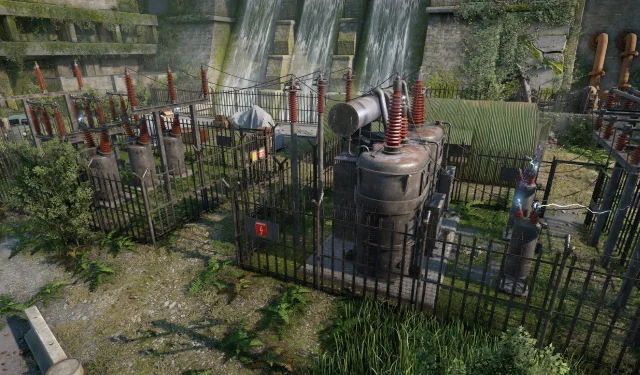
Located north of Atomfall’s Casterfell Woods, the Casterfell Dam is a sprawling structure that serves as both a challenge and an opportunity for players. It’s a hub of activity fraught with danger, primarily due to its resident hostile druids, who are armed with bows and melee weapons. Additionally, the dam is secured with electrified fences, which pose a significant threat to unwary explorers.
Within these high-voltage areas, valuable loot awaits for the brave. Fortunately, players can disable the power to these fences, giving them the chance to retrieve hidden treasures.
Locating Casterfell Dam in Atomfall


Casterfell Dam is situated at coordinates 20.9 E, 90.9 N on the game map, nestled within the Casterfell Woods region. Upon your arrival, players should prepare to encounter several druids. Stealth maneuvers might be necessary to navigate these foes, or players can opt to engage them directly for a smoother exploration experience.
There are three electric fences encircling the dam that are easily identifiable due to their pulsating electricity, which inflicts the Shocked status effect on contact. Successful entry into these secured zones requires disabling the fences first.
Deactivating the Electric Fences in Atomfall
Near the dam lies a structure housing the Control Room, located at coordinates 20.4 E, 90.9 N. Inside, players will discover a console featuring a lever and a map illuminated with three distinct lights indicative of the fence statuses.
Of the three lights, two will shine green, indicating active electrification of the corresponding fences, while one light will be red, signaling the powered-down fence. Pulling the lever changes the status of the fences; activating one while deactivating another. This mechanic introduces a strategic element, requiring players to think critically about their approach.
On the opposite side of the Control Room, players may come across a corpse named Jenks, significant to the Datlow Hall questline.
Loot in Fenced Areas
Each fenced area conceals unique loot opportunities. Here’s a breakdown:
First Fence
The closest fence to the Control Room is inactive upon arrival. While it contains no treasures, it serves as an example of what players will encounter when the fences are electrified.
Second Fence
This fence is positioned between the first and third fences. Players equipped with a Metal Detector will receive a signal as they approach. Once the power is deactivated, treasure hunters can use their detector here to locate a buried cache, which contains the Crafting Recipe for the Explosive Lure along with miscellaneous items.
Third Fence
The last fence, furthest from the Control Room, yields the most significant rewards. Players will discover a backpack filled with crafting materials, potatoes, and, most critically, an Atomic Battery. This valuable item is essential for powering various areas within The Interchange, making it imperative for players to secure it.
For more detailed strategies and tips on tackling these challenges, visit this source.