

“Hush, Hush, Sweet Cherie”is the sixth chapter of the captivating action-adventure campaign, South of Midnight. The protagonist, Hazel, embarks on a thrilling journey as she embraces her role as a Weaver, leveraging her unique abilities to face off against various creatures. In this particular chapter, Hazel sets off to Bunny’s cottage in pursuit of clues related to the enigmatic figure known as Huggin’ Molly.
This guide provides a detailed walkthrough of “Hush, Hush, Sweet Cherie”within South of Midnight.
A Comprehensive Walkthrough of “Hush, Hush, Sweet Cherie”

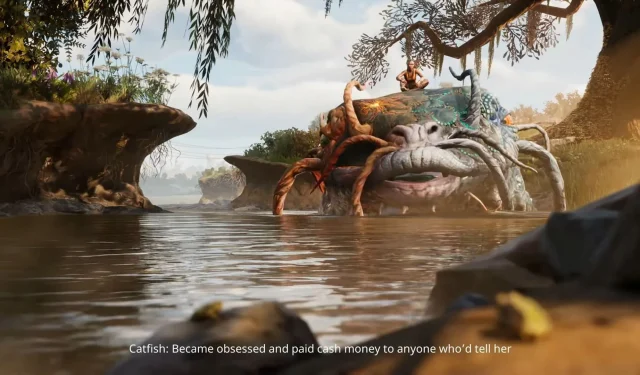
The narrative kicks off when a catfish delivers Hazel to Bunny’s cottage, at which point you’ll automatically receive the storybook for “Hush, Hush, Sweet Cherie.”Once you gain control of Hazel, head to the upgrades menu to explore your newly expanded abilities. Every skill unlocks a second tier, along with four additional upgrades in the “General”skill tree.
At this juncture, consider prioritizing upgrades such as Cleansing Rend, which provides an area-of-effect attack; Bob and Weave for an extra dash charge; or Immobilizing Push and Fettered Hand to weave through enemies without triggering a cooldown.

Once the upgrades are complete, follow the guiding strand that leads to a fork in the road—one path to the left and two more to the right. The right side branches into two routes; one leads to a burrow suitable for Crouton, where you can uncover a pile of rocks containing five Floofs. The other path requires destroying branches to obtain another Floof knot.

Return to the center of the fork and venture left to initiate a combat encounter. If you find yourself overwhelmed, deploy your Cleansing Rend to inflict damage on nearby enemies. After overcoming the encounter, before resuming your trek along the guiding strand, head to the left pier to discover a flipping metal sheet that yields another five Floofs.
Follow the strand until you spot a memory object. Prior to reaching it, deviate to the right path where a fox resides, guiding you toward an area laden with thorny brambles housing two Floof knots. One is nestled beside some expanding spike balls, while the other is elevated high above.
At this point, you should have accumulated enough Floofs for another upgrade. Consider investing in Closing the Loop from the General skill tree, as it allows your Strand Blasts—explosions generated while dodging and unraveling—to automatically weave enemies.

Return to the path and activate the memory object, then navigate through a bramble-filled route. Freeze and leap across a boat to uncover the Keep Out Sign Materials collectible located on a wooden crate in this chapter. To the left, spot an echo wall and jump down to access it. Before crossing, explore the right opening to find an additional Floof knot.
Proceed until you encounter another fork in the road where crows gather on the left. Clear the branches blocking the entrance to reveal more Floofs. Then, take the right path.

Follow the main path until you reach another fork, where you’ll find a wooden door marked “Old Smokey.”Inside, you’ll discover a flipable metal sheet on the right and a burrow for Crouton on the left. Guide him to the Stigma Knot, taking care to avoid red ants and brambles en route. Afterward, exit through the gate and proceed along the path until you spot an Echo cart.

Push the cart forward and climb onto it to access a roof. Destroy the wooden planks for a Health Filament and find another collectible, Abernathy’s Lament, resting on a wooden box nearby. Exit the house and adhere to the guiding strand to progress further in “Hush, Hush, Sweet Cherie.”

You’ll encounter several obstacles such as brambles and exploding mushrooms. Use Hazel’s movement abilities to navigate the brambles, utilizing nearby rocks or Crouton to deal with the mushrooms. Clear the branches to access Bunny’s cottage. Instead of proceeding directly, divert right where you’ll find a burrow for Crouton and a Floof Knot to uncover.
Exploring Bunny’s Cottage
Upon reaching the cottage gates, consider turning left to discover an optional combat arena featuring three Ravagers, two Hurlers, and a nest. Nearby, an additional collectible titled “Burn after Reading”is located above a wooden box near the arena’s entrance.
Backtrack into the cottage’s gates but immediately veer left to uncover a Floof knot tucked into the corner of the structure.

Head left while honing close to the edge until you come across a few sets of wooden stairs leading to another combat encounter. Finishing this battle triggers a cutscene centered on Bunny. You can observe the toy near the pier and search beside the wooden boats for a metal sheet. Ascend the stairs again and navigate left to retrieve another Floof knot, continuing along the Guiding Strand until you reach a garden centerpiece.

This triggers yet another combat sequence. Move through the gate adjacent to a white house and check behind it for a burrow.

Next to the burrow, a stack of yellow and blue boxes awaits, where you’ll discover yet another collectible called Correction Requested.

Proceed along the Guiding Strand to initiate another combat engagement. After unraveling the final echo knot, a climax scene with Bunny will unfold, leading to an exhilarating chase sequence. Here, leap, glide, and dash to dodge obstacles as you progress. Completing this chase opens the path to the cottage, allowing you to step inside through the initial gate.
Gaining Access to the Cottage

In the first room on the right, find a collectible titled Notes on the Rogarou. Advance to the end of the hall and locate a small gap in the broken door on the right. Use Crouton to access it and unearth a pile of rocks. Then, proceed upstairs and navigate right to continue your quest, as the left path offers no essential items.

On the shelves beside the bed, uncover the sixth and seventh collectibles. Interact with the golden rabbit statue set below a painting of a mother and child, prompting the revelation of a secret area. The collectible “Missing Children List”will be found on a sewing machine nearby. Take time to inspect various clues such as red yarn, three photographs, missing children’s posters, five distaff patterns, and a Benjy chunk in the corner, which will trigger an important cutscene.

After your exploration, follow the Guiding Strand to exit the cottage. Beyond the exploding mushrooms, search for a tree with a birdhole located on the right side of the path, which will hold another collectible titled Burrowers Hate a Liar. On the left side of this tree, a grapple point awaits, leading to a sizeable Floof knot. With this, you may have enough points for yet another upgrade, with Stigma Conversion being a favorable option. Return to the main road.

Continue along the Guiding Strand, squeezing through an opening to trigger a cutscene. Once you regain control of Hazel, advance further into “Hush, Hush, Sweet Cherie.”You will come across a grapple point, but take a left instead. Freeze the echo bridge and leap over to uncover a concealed combat arena. After conquering this challenge, look for the next collectible on a box near the arena’s exit just before the elevated platforms. Utilize the echo platform to wall-run and collect the Floof knot below.

After using the grapple point, wall-run to cross to the next platform. Before proceeding upward, head right to find another flippable metal sheet. Climb the mountain’s side and veer right while at the edge to drop onto a lower platform, initiating another climbing sequence. Be prepared to move left during the mid-section of this ascent.

Upon reaching the summit, you’ll discover the elusive Cherie Tree. Uncover the tangle on the right to obtain the Bunny Pattern, marking the conclusion of “Hush, Hush, Sweet Cherie.”