Managing a drug empire in Schedule 1 can be quite a challenging feat for a solo player. Fortunately, enhancing your operational efficiency is possible by automating tasks through the hiring of employees. With an ample supply of manpower available in the game, utilizing this resource effectively can significantly boost your profits.
However, the journey doesn’t end with merely hiring staff; ensuring they perform their duties optimally involves a few strategic steps. This guide aims to provide essential insights on how to effectively manage your employees as well as key aspects of the automation system within Schedule 1.
Utilizing Employees in Schedule 1

Upon hiring your initial employee from Manny at the Warehouse, you will receive the Management Clipboard, your primary tool for navigating the workforce. Your hired hands can typically be found stationed outside your main residence, ready to be assigned tasks. For illustrative purposes in this guide, we will focus on managing the Sweatshop located above the Chinese restaurant.
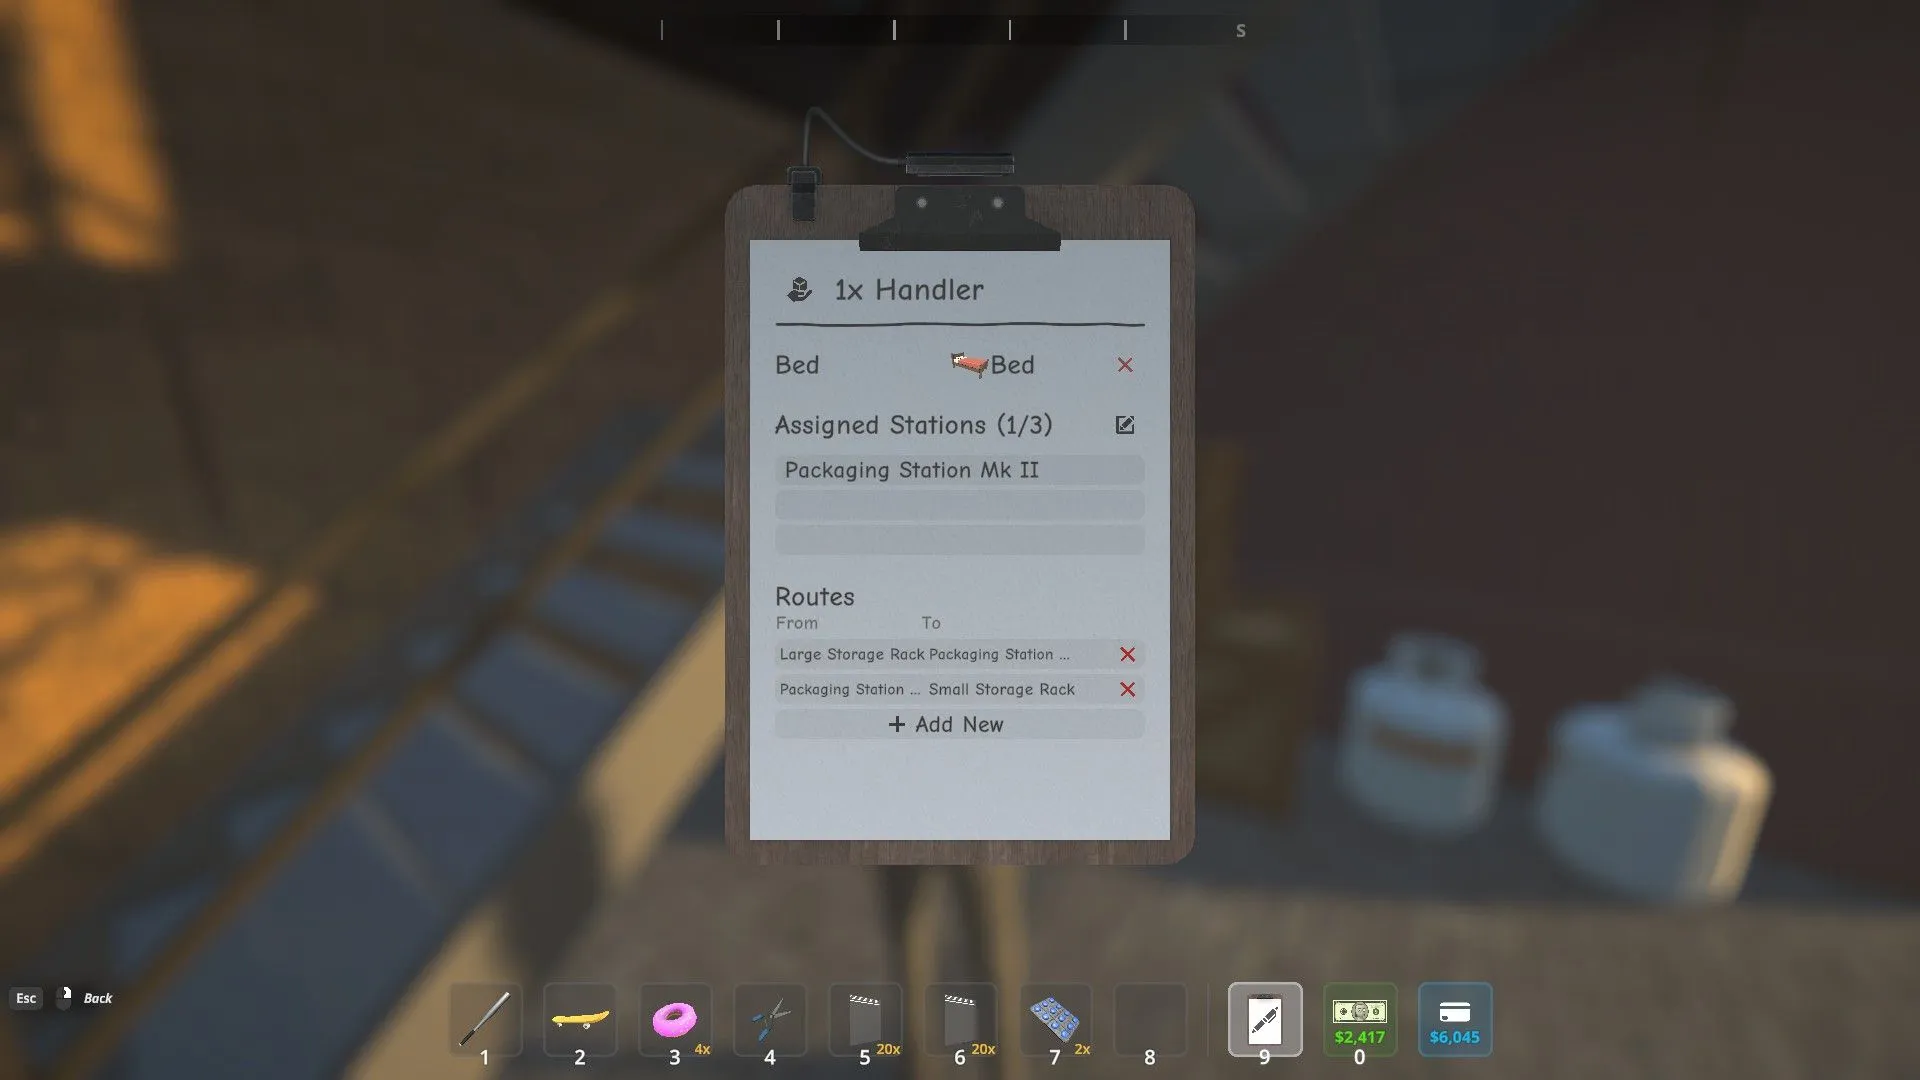
Each employee has distinct roles that differ from those of dealers in Schedule 1. To get your workers to start their duties, you will need to follow a uniform procedure that applies to all types of employees. For demonstration, we will consider a Handler as our example.
How to Assign Beds and Workstations
To effectively manage your workforce, the first step is to assign each worker to a suitable station. Follow these easy steps:
- Open your Management Clipboard.
- Get close to your employee.
- Press E to access the worker options menu.
- Click on “None”next to Bed at the top of the clipboard screen.
- Select the desired Bed to assign.
- Left-click on the chosen bed.
For assigning a workstation, repeat the aforementioned steps, ensuring to select an appropriate workstation. The types of workstations vary according to the worker’s role, and you can easily manage these with the clipboard:
- Handlers: Packaging Stations
- Cleaners: Trash Cans
- Botanists: Pots/Tents
- Chemists: Mixing/Chemistry Stations
Once you’ve assigned a bed, a suitcase will appear on it, indicating the worker’s readiness. To ensure your employees commence work promptly, deposit cash into their suitcase by visiting an ATM. Alternatively, players may explore using cheats available in Schedule 1 to facilitate this process.
If your staff require specific Supplies, it’s essential to assign them to containers filled with the necessary materials. For instance, when managing a Botanist, ensure they have access to containers stocked with seeds.
Establishing Routes for Handlers

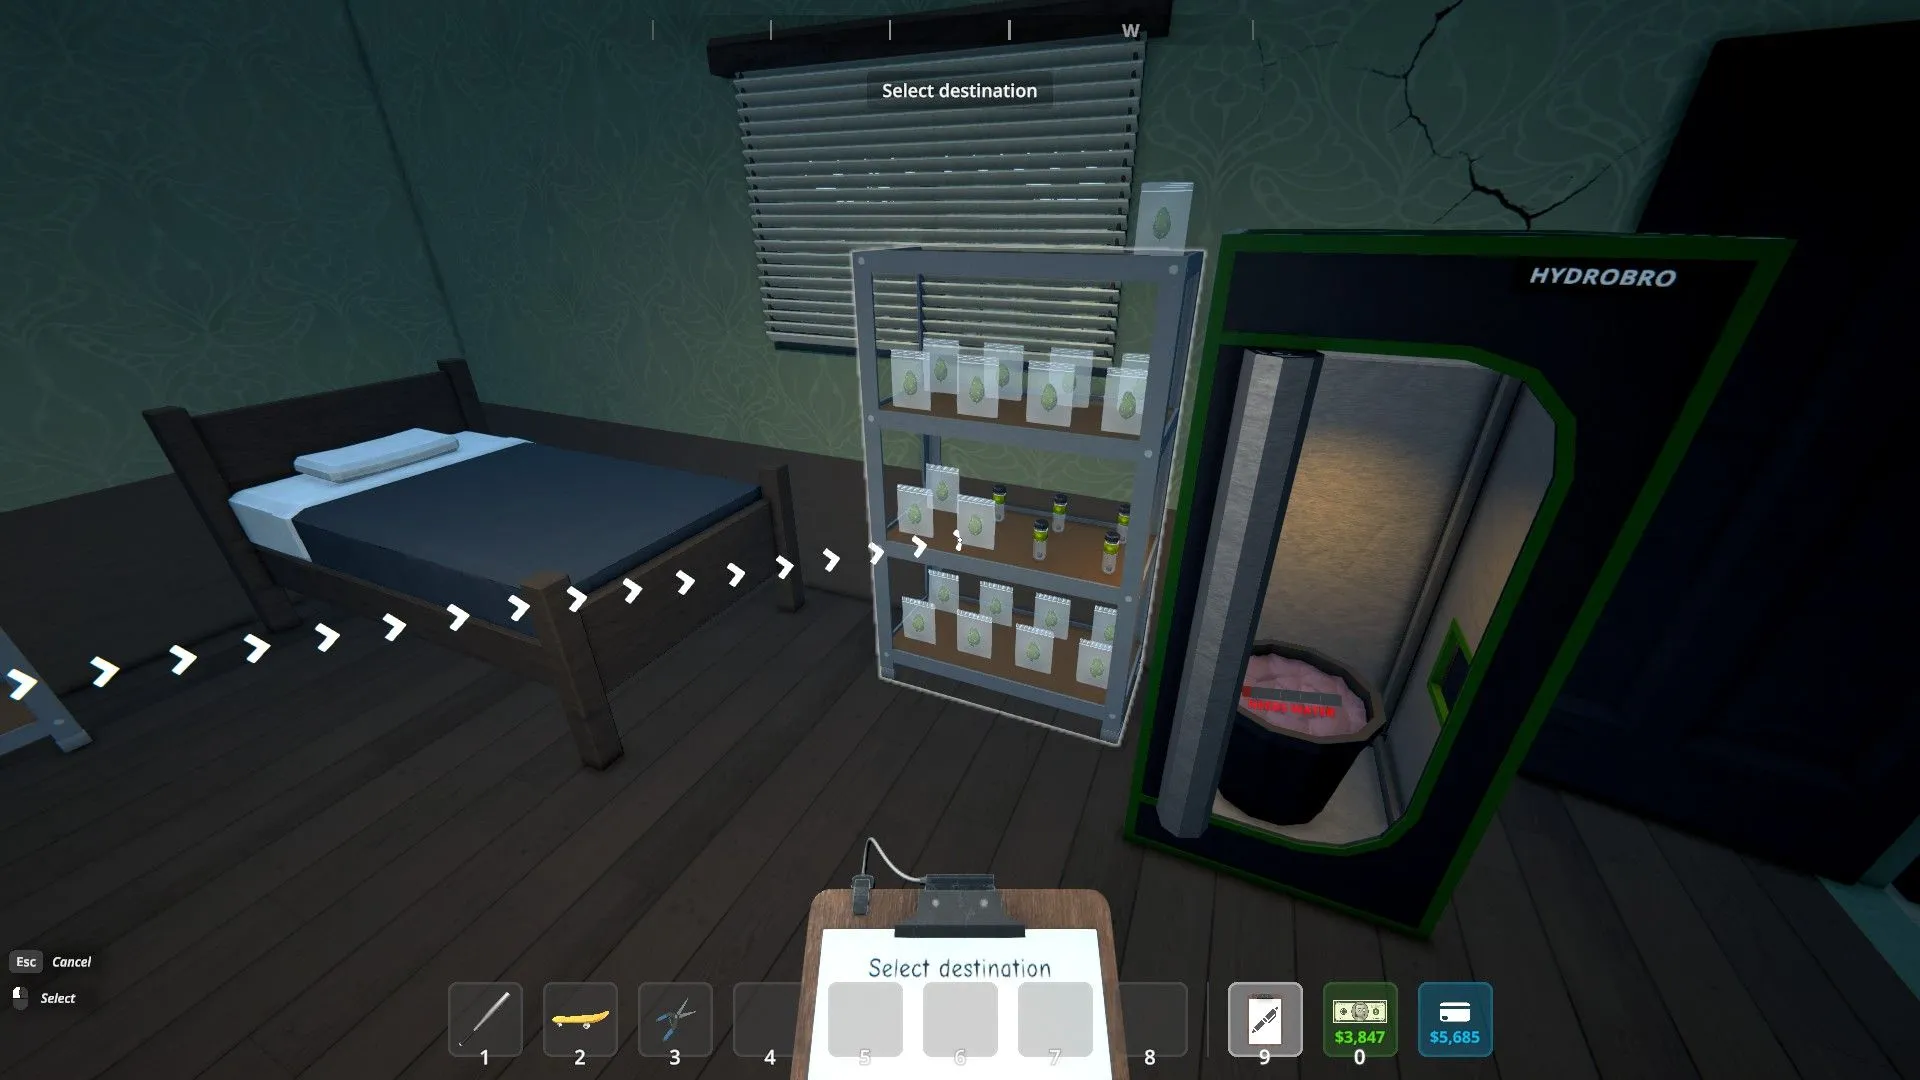
Setting routes for your employees provides them with waypoints to follow during their shifts. By implementing a route, your workers can transport items to and from storage containers, eliminating the need for you to manually handle items. Here’s how to define a route:
- Approach your employee and interact using the clipboard.
- In the Routes section, select “Add New.”
- To establish a starting point, click on “From – None.”
- Choose your desired starting point, then press LMB.
- To set the end point, click on “To – None.”
- Choose the end point and press LMB again.
When correctly configured, your worker will retrieve relevant items from a storage container, utilize them at a workstation, and finally return the processed items to the appropriate storage. You can also interact with various workstations via the clipboard to specify their output destinations, which is particularly useful for ensuring Botanists store their products in the right containers.
Always ensure your routes are concise and clear; lengthy or complex paths may lead to AI pathfinding errors, causing your workers to stand idle until you intervene.


