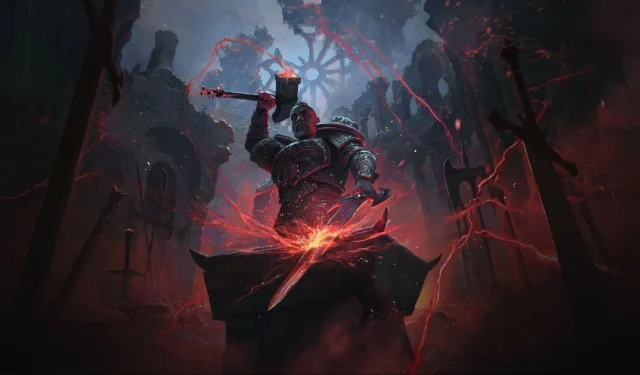


In the recently released Dawn of The Hunt update (0.2.0) for Path of Exile 2, a new Ascendancy called Smith of Kitava has garnered attention for its remarkable power. This build showcases the ability to effectively clear screens and dispatch bosses with relative ease. The Warrior class, particularly when utilizing the Smith of Kitava Ascendancy, proves formidable, making it an appealing option for many players.
While it’s worth noting that one aspect of this build received minor adjustments—a fix to a bug that caused melee splash radius modifiers to amplify twice—players still report that the overall effectiveness remains strong. Many adventurers are effortlessly navigating maps equipped with a mace and bolstered by the Herald of Ash. Below is a comprehensive guide on optimizing your Smith of Kitava build.
Essential Mechanics and Skills for Your Smith of Kitava Build
The Smith of Kitava build is designed for ease of use, whether you are leveling up or engaging in endgame content. The strategy is simple: engage in combat, swing your mace, and witness your foes being overwhelmed in fiery explosions. Players can utilize Mace Strike—the primary melee attack for mace users—throughout their battles, though alternatives do exist.

While you may consider utilizing Rolling Slam for its built-in AOE and crowd control effects, it’s entirely optional. The key takeaway is to maximize the Herald of Ash buff, which ignites enemies when you significantly exceed their health threshold.
With a suitable mace in hand, clearing groups of enemies becomes a breeze. For boss encounters, turn your attention to Perfect Strike. Despite the nerf it received, its damage output continues to impress players.
Final Skill Setup
- Mace Strike: Reach, Ancestral Call, Martial Tempo, Magnified Effect, Fire Infusion
- Infernal Cry: Premeditation, Tireless, Raging Cry
- Perfect Strike: Eternal Flame, Window of Opportunity, Close Combat, Primal Armament
- Boneshatter: Overpower, Impact Shockwave
- Leap Slam: Holy Descent, Momentum, Fire Exposure
- Herald of Ash
- Blink: Ingenuity
- Overwhelming Presence: Cannibalism, Vitality
- Hammer of the Gods: Fist of War, Rageforged, Hourglass, Aftershock
As you progress through Act 2 and Act 3, consider pairing Leap Slam with Boneshatter for effective mob clearing. This combo may be a bit slow but delivers substantial AOE damage.
If you find that Leap Slam is creating heavy stuns that interfere with your Boneshatter damage, the Brink mechanic can be a beneficial addition, preventing excessive stuns. However, discontinue its use once you acquire Hammer of the Gods to capitalize on those hammer triggers.
Optimal Itemization for Your Smith of Kitava Build
When it comes to gearing your Smith of Kitava build, one crucial unique item stands out: Infernoclasp (Plate Belt). This item provides substantial tankiness with +102 armor, along with increased strength and fire resistance, making it a vital part of your setup.

Your weapon choice will likely revolve around two-handed maces, although a swift one-handed option can also serve well. Once you obtain a Zealot’s Mace, particularly around Cruel difficulty, you can anticipate significant improvements in your clearing capabilities. Ultimately, aim for a Fanatic Greathammer paired with a Shield featuring Block Chance.
For players interested in utilizing Blink, sufficient Intelligence is essential. Seek gear with All Attributes, or a blend of Strength and Intelligence to meet Blink’s requirements efficiently.
Adopting the Smith of Kitava Ascendancy grants access to unique modifiers such as Coal Stoker, enabling fire resistance modifiers to also provide split Cold and Lightning resistance. This means prioritizing gear with Desert Runes will enhance your overall survivability and performance. As a Warrior, it’s also vital to focus on increasing your Strength.
Passive Node Progression for Smith of Kitava

The above illustration showcases the comprehensive passive node layout for the Warrior class tailored to the Smith of Kitava build. Below are key nodes to consider:
- Giant’s Blood: Enables wielding two-handed axes/maces/swords effectively, adjusting their attribute requirements.
- Iron Reflexes: Converts all evasive ratings into armor, enhancing survivability.
- Resolute Technique: Guarantees that your hits cannot be evaded, though you sacrifice critical hits.
Your progression should focus on the final route mentioned above. Initially, you’ll choose between two paths: one with Reverberating Impact for late-game strategy (~Level 80), while the other can utilize Smash for earlier levels. Opt for Resolute Technique depending on your equipment’s accuracy stats.
Subsequently, proceed downwards to acquire Giant’s Blood and its associated Strength nodes. Fill in any gaps from previously skipped paths as needed, then navigate north towards block nodes before progressing southwards toward Polymath and other beneficial nodes.

Upon unlocking points for the Smith of Kitava Ascendancy, focus on the following order: Coal Stoker, Fire Resistance (Right), Fire Resistance (South), Smith’s Masterwork, Tantalum Alloy, Molten Symbol, and Kitavan Engraving. If your resistance stats are robust enough, consider swapping out Tantalum Alloy for Support Straps to further boost your effectiveness while wielding heavier weapons.
- Coal Stoker
- Fire Resistance (Right)
- Fire Resistance (South)
- Smith’s Masterwork (Free)
- Tantalum Alloy
- Molten Symbol
- Kitavan Engraving
- Leather Bindings
- Drop Tantalum Alloy, and grab Support Straps if your Fire Resistance is adequate and you possess a strength-driven weapon.