

This post contains spoilers for One Piece.
Episode Highlights
- Zoro’s confrontation with Lucci ignites significant discussion among fans.
- Zoro employed the King of Hell technique during his match against Lucci, showcasing his formidable abilities.
- Luffy engages Kizaru using both Snakeman and Gear Fifth, reflecting his evolving strength.
One Piece Episode 1126 delivered thrilling entertainment, primarily centering on the showdown between Luffy and Kizaru. These two characters are renowned as some of the most powerful fighters in the series, heightening fan anticipation for their battle.
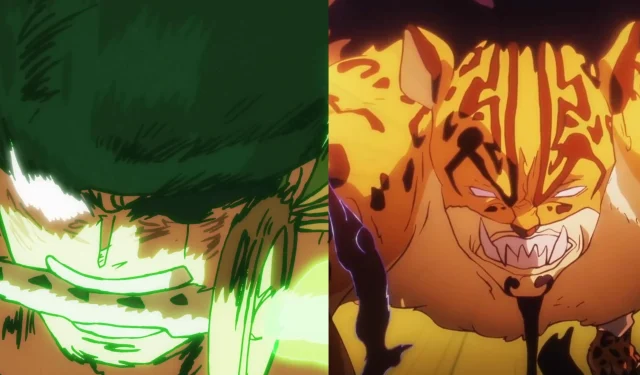
In the sneak peek for Episode 1127, viewers were treated to a glimpse of Zoro clashing with Rob Lucci. Lucci, utilizing his awakened Zoan form, signals that he is fully committed to the fight. On the other hand, Zoro brandished all three of his swords, glowing with a distinct green aura, leading to a lively debate in the One Piece fandom regarding the nature of the battle.
Did Zoro Employ King of Hell Against Lucci?


As mentioned earlier, the preview for Episode 1127 showed Zoro energetically battling Lucci. While some fans pointed out the absence of black lightning that typically signifies the use of Conqueror’s Haki, which led to speculation about whether Zoro deployed King of Hell, these assumptions appear to be misconstrued. In One Piece Chapter 1093, Zoro is depicted clearly using the King of Hell technique, with his blades radiating both a distinct aura and black lightning. Given the threat posed by Lucci—who possesses an Awakened form along with Haki and Rokushiki—Zoro’s utilization of his strongest techniques is more than justified.
The confrontation with Lucci marks a considerable challenge for Zoro. Although he has previously vanquished numerous formidable opponents, Lucci stands out as one of the finest. Even a moment’s hesitation in their duel could be perilous for Zoro. However, with Lucci’s recent defeats against Luffy and Stussy, where he was severely weakened, he may find it difficult to hold his ground against Zoro’s skill and determination.
Major Moments in One Piece Episode 1126

Although Zoro and Lucci did not appear in Episode 1126, the episode still featured gripping events. It commenced with Kuma’s chaotic escape from the Kamabakka Kingdom, utilizing his Devil Fruit abilities to reach Red Port. Upon scaling the Red Line to Marijoa, Kuma encountered soldiers who were powerless to halt him. Fleet Admiral Sakazuki attempted to put an end to Kuma’s advance but was thwarted when Kuma escaped using his powers.
“I can see why you could defeat Kaido.”— Kizaru to Luffy
The other pivotal moment centered on Luffy’s encounter with Kizaru. Having faced off previously at Sabaody Archipelago with disastrous results, Luffy now claims that his crew has become exponentially stronger. He initiated the fight employing Snakeman, a variant of Gear Fourth that prioritizes speed, a prudent choice against Kizaru, who is arguably the quickest character in the narrative. Wielding the Pika Pika no Mi, Kizaru commands the power of light, which can inflict severe damage. Despite Luffy’s Snakeman attack, he was launched away by the Admiral’s counterattack.
The Anticipation for Upcoming Fights

Yet, Luffy regained his footing, escalating the battle with Gear Fifth. In this state, he significantly increased his size, ensnaring Kizaru and dragging him out of the fight. Gear Fifth represents the zenith of Luffy’s power, indicating his serious intent during their clash. The episode concluded with a teaser of a gigantic, dormant robot awaiting its moment to awaken.
https://www.youtube.com/watch?v=weItkWjlR1Mhttps://www.youtube.com/watch?v=weItkWjlR1M
The heartbeat of Luffy appears to rouse the robot, and as Episode 1127 approaches, it is poised to reveal more about this intriguing development—all while delivering epic confrontations, including Luffy vs. Kizaru and Zoro vs. Lucci.