
In the latest episode of One Piece, episode 1124, significant insights were provided regarding a long-discussed incident within the Egghead Arc. The narrative unfolds following the mysterious disappearance of Dr. Vegapunk, leading to a surprising alliance among the Straw Hat Pirates, the elite CP0 agents sent to eliminate the scientist, and Vegapunk’s remaining satellite bodies. Together, they united to battle the formidable Seraphim cyborgs operating under Vegapunk York’s orders.
York had clandestinely schemed to exchange Vegapunk’s head for a privileged opportunity to rise to the status of a Celestial Dragon. In her quest for power, she activated the Seraphim—advanced cyborgs engineered using genes from the former Seven Warlords and enhanced with the genetics of King, a Lunarian. Under her command, these creations were set loose to wreak havoc across Egghead.
This instigated a split among the Straw Hats, CP0 agents, and Vegapunk’s remaining satellite bodies as they pursued the Seraphim in various segments of Egghead’s laboratory. After a prolonged night of fighting, the Seraphim were subdued, effectively thwarting York’s plans.
Episode 1124 of One Piece: Unveiling the Battle Against the Seraphim
The Seraphim’s Rampage on Egghead
")
Years prior to the current storyline, Dr. Vegapunk conducted pivotal experiments on Alber, who would later gain recognition as King, Kaido’s most formidable ally. Commissioned by the World Government, Vegapunk rigorously tested King’s Lunarian powers. The DNA acquired from King was instrumental in the creation of the Seraphim.
These Seraphim represented a significant upgrade from the initial Pacifista cyborgs, designed to anchor the former Seven Warlords’ likenesses, albeit in a larger, more powerful form. They were imbued with the Lineage Factor of these Warlords, granting them access to inherited combat skills and equipped with synthetic versions of certain Devil Fruits.
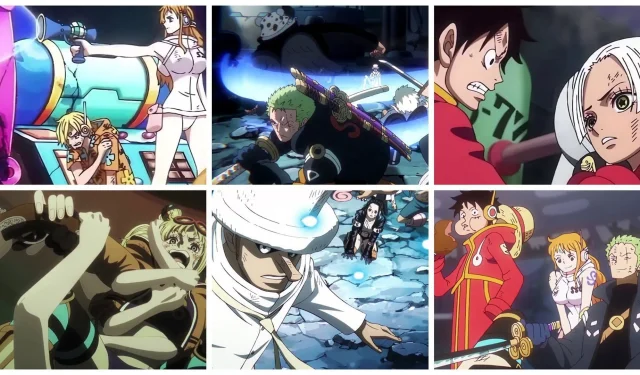
To eliminate all opposition, Vegapunk York deployed four Seraphim on Egghead: S-Hawk (modeled after Dracule Mihawk), S-Bear (inspired by Bartholomew Kuma), S-Snake (reflecting Boa Hancock), and S-Shark (representing Jinbe). Despite lacking the fiery magma-like abilities of King, these Seraphim remained significant adversaries, thanks to the extensive durability conferred by Lunarian DNA, allowing them to weather catastrophic assaults without major damage.
The battle saw Monkey D. Luffy and Roronoa Zoro join forces with Rob Lucci and Kaku, forming a temporary alliance against their shared foes S-Hawk and S-Bear. However, when S-Hawk veered off to chase alternative targets, Zoro pursued him, with Luffy sending Kaku to ensure Zoro wouldn’t lose his way.
In another area, S-Snake dominated Franky, Usopp, Vegapunk Pythagoras, and Vegapunk Lilith, while Nami, Sanji, and Brook faced off against S-Shark. Fascinated by the Seraphim’s remarkable resilience, Luffy compared them to the formidable Kaido.
")
The One Piece manga provided little detail on the battle’s progression, skipping ahead to display Yard’s capture by the Straw Hat Pirates within Egghead’s laboratory. The Five Elders were caught off-guard by her frantic call for assistance, as they had anticipated her control over the situation due to the Seraphim’s might.
Ultimately, the Seraphim were depicted captured within Vegapunk’s specially designed bubbles, which utilized Seastone to inhibit their abilities as Devil Fruit users. The manga left the specifics of how they became immobilized to speculation, a gap filled by episode 1124 of One Piece.
Stopping S-Hawk, S-Bear, S-Snake, and S-Shark
")
Episode 1124, titled “Completely Surrounded! The Operation to Escape Egghead,”intricately explores the much-anticipated details of the Seraphim’s downfall. Due to constraints from his involvement in the Netflix adaptation, author Eiichiro Oda accelerated the pacing of the Egghead Arc, skipping certain details in the manga.
Instead, Oda left the exposition of this combat to the anime, utilizing quick flashbacks to illustrate York’s defeat and the Seraphim’s subjugation. As Nico Robin traversed the chaos, she encountered York, who had confined the main body of Vegapunk, the “Stella”. Using her Flower-Flower Fruit, Robin freed Vegapunk and ensnared York in retaliation, but soon found herself overwhelmed by the sudden appearance of S-Hawk and S-Bear, leading to a swift defeat.
Just as the situation seemed dire, Roronoa Zoro intervened heroically, dispatching both S-Hawk and S-Bear in one rapid move, securing safety for Robin and her allies.
")
Meanwhile, in another section of Egghead, Nami intervened to support Sanji against S-Shark, employing a Seastone-coated bubble from Vegapunk’s arsenal that instantaneously imprisoned him. Luffy’s engagement with S-Snake became a humorous encounter, as he mistook her for Boa Hancock and requested her assistance to free his companions.
Oblivious to her true intentions, S-Snake was charmed by Luffy, consenting to revert Franky, Usopp, and Vegapunk Lilith from their stone state, similar to Hancock. Notably, the manga hinted at these developments previously, with Nami grasping the bubble gun and Sanji exhibiting injuries reflective of his earlier conflict with S-Shark.
")
This clever foreshadowing by Oda allowed for coherent plot development and connects scenes seamlessly across the anime and manga. Additionally, Zoro’s role in the eventual capture of York was subtly suggested, as he was shown poised with his sword to her neck, further hinting at his pivotal contribution to the battle’s outcome. Through this rich narrative engagement, the adaptation individualizes the fight and gives fans hope that further unseen conflicts during the Egghead Arc will be explored in future episodes.
For fans who appreciate the depth of One Piece, episode 1124 has indeed broadened the understanding of this pivotal battle, offering insightful revelations that enrich the overall narrative.