
In the sixth chapter of Ninja Gaiden 2 Black, players navigate through a town besieged by werewolves, culminating in the climactic ascent to the King of the Lycanthropes in Chapter 7: The Lycanthropes’ Castle. As Ryu Hayabusa, you will continue your fight against a horde of fiends. This comprehensive guide will deliver a detailed walkthrough, revealing the locations of every collectible in the seventh chapter of Ninja Gaiden 2 Black.
Chapter 7 Walkthrough Part 1 – Ninja Gaiden 2 Black
How to Reach the Roof:

This guide is organized into sections, with each part representing the journey between save points. Part 1 covers the beginning of Chapter 7 up to the first save point.
The action picks up right where Chapter 6 concluded, with Ryu submerged following the demise of The Water Dragon. After the cutscene, focus your gaze on the rooftop of the ruins where that epic battle took place. To ascend to the roof, locate two pillars flanking a broken pillar—use this as your launching point for a wall jump.
Crystal Skull 1:

Upon reaching the roof, you’ll discover a Muramasa shop at the far end. Proceed ahead and defeat the white fish enemies that attack you. After vanquishing them, backtrack to find the thirteenth Crystal Skull, the first of three located in this chapter; it rests on a ledge below the peak of the rooftop. At the front of the roof by the shop, there’s a hidden chest nestled in a small recess.
Exit the Underground Cavern – Save Point 1:

Move past the Muramasa Shop toward the right-side pillars, ready yourself to jump across. Beware of the fish enemies attempting to attach themselves to you. Continue along the path, veering left to find a chest filled with yellow currency orbs at a dead end, or right along the main path to encounter spiny snake enemies.
Exercise caution in this area as sections of the ground are unstable and can lead to a fall into the water. After defeating the spiny enemies, locate a chest containing red orbs to the left before traversing the circular pillar structure. Navigate carefully around the ruins, remaining vigilant against more fish enemies. Another chest is present to the left as you jump from the circular structure.
Follow the pillars and you’ll find the first save point nestled within a small chamber at the terminus of this section.
Chapter 7 Walkthrough Part 2 – Ninja Gaiden 2 Black
Jewel of the Demon Seal:

The Jewel of the Demon Seal can be found immediately after leaving the first save point. Navigate through a narrow earthen tunnel that gradually expands. A swarm of small, scorpion-like enemies will emerge to challenge you. Once they are dispatched, look for a deceased body that holds the jewel.
Gogmagog Boss Fight:


After exiting the dirt tunnel, a towering pile of bones awaits you. Upon reaching the top, numerous scorpion enemies will assault you. Defeat them swiftly and prepare for a cutscene that heralds Gogmagog’s arrival.

Though Gogmagog seems intimidating, this fight can be simplified by focusing your attacks on its legs, causing it to topple and allowing for massive damage while it’s down. Remember to exercise caution; reckless button mashing can lead to substantial damage from Gogmagog’s retaliatory strikes. Defensively blocking and dodging will yield the best strategy for success.
New Weapon – Kusari-gama:

Following Gogmagog’s defeat, a wall-jump area opens up, leading you onward. Ascend the path, wall-running across a gap, and discover the body possessing the Kusari-gama. Don’t forget to collect the yellow orbs from the nearby chest after acquiring your new weapon.
Save Point 2:

Continue upward until you reach a small chamber housing the second save point, complete with a chest containing an Herb of Spiritual Life.
Save Point 3, Muramasa Shop & Crystal Skull 2:
From the second save point, venture along the path that leads outside the cave onto the castle ramparts. A cutscene initiates, revealing a worthy adversary has made an appearance, prompting Volf to unleash a storm upon you. After the cinematic, identify the guillotine near the cave exit.


Cut the rope attached to the guillotine blade to reveal a hidden area below where Crystal Skull 14 resides. After you collect it, you’ll find Save Point 3 just ahead, adjacent to the door leading down a lengthy hallway. To the right of this door, you can ascend the stairs to find another Muramasa Shop, along with a small tower offering a chest filled with a large currency orb at its peak.
Chapter 7 Walkthrough Part 3 – Ninja Gaiden 2 Black
Save Point 4:

Upon leaving Save Point 3, ascend numerous flights of stairs until you face a grand door that is unfortunately locked. Assess the surroundings; pathways to the left and right lead away from the entrance.

The left path concludes at a dead end with a chest containing red orbs. However, the right path leads around to the side of the building and towards Save Point 4.
Enter the Cathedral:

From Save Point 4, climb the ladder and ascend to the rooftops. No collectibles await you until you reach the cathedral, so prioritize enemy encounters. Soon, you’ll encounter a section with three elongated flagpoles extending before a large stained-glass window. Swing from pole to pole until you pass through the window and into the cathedral’s interior.

Life of the Gods:


Descending into the kitchen area from the cathedral courtyard, face off against the werewolves that ambush you before entering a room filled with barrels. In the far corner, a chest is obscured by barrels—destroy them to access NG2Bi’s tenth Life of the Gods upgrade.
Save Point 5:


After securing the Life of the Gods, Save Point 5 is located to your right. Upon exiting, you’ll navigate a large chamber with a massive staircase—but initially, it leads to nowhere significant. Although the upper area contains a chest with a large currency orb, the main path continues through the door from which a werewolf had charged you.
New Weapon – Tonfa:

After exiting the staircase chamber, traverse a dining area and an ambush room before entering a grand stone chamber adorned with a large portrait of Volf. Vanquish all enemies present, and a chest will materialize beneath the portrait containing your new weapon, the Tonfa.
Save Point 6:

Upon collecting the Tonfa, exit through the door and navigate back to the earlier staircase chamber. Ascending will trigger a wave of werewolves bursting through a right-side door. Defend yourself and proceed through the door to locate Save Point 6 while climbing the ornate marble stairs.
Chapter 7 Walkthrough Part 4 – Ninja Gaiden 2 Black
Crystal Skull 3:

The last Crystal Skull in Chapter 7 can be found within the library chamber located at the peak of the marble staircase, where Save Point 6 is situated. Following the defeat of the enemies inside, position yourself with your back to the fireplace and strike the bookcase to your left, adjacent to the right corner of your perspective. Refer to the image above for its precise location; the fifteenth Crystal Skull will be unveiled.
Save Point 7:

After claiming the skull, return to the fireplace, step inside, and employ a wall jump to ascend the chimney for the next level. In the upcoming chamber, dispatch the remaining enemies, then locate another fireplace to perform a similar jump, leading you to the roof where Save Point 7 is found.
Masamura Shop 2:


After Save Point 7, leap across the bars. Proceed around the corner, where a troop of werewolves will ambush you. If you seek to use a Masamura Shop, avoid the large door and ascend the stairs on the opposite side of the building, where you’ll find the shop along with two chests. One chest may be tricky, as it holds aggressive fish enemies, while the other contains red orbs.
Save Point 8:


Beyond Save Point 7, proceed up the grand staircase where you will finally confront Volf. He’ll inform you that the throne room isn’t the ideal venue for your clash, suggesting the Colosseum instead. After eliminating the foes in the throne room, descend through the trap door before the throne, which leads to a canal. Here, you’ll find a chest with blue healing orbs, in addition to Save Point 8.
Reach the Colosseum:

Upon exiting the canal, you’ll find yourself back at the castle’s front, below the once-locked grand door. Traverse the stairs you ascended initially to reach a now-lowered bridge. Cross the bridge and open a nearby chest to acquire a large yellow currency orb.
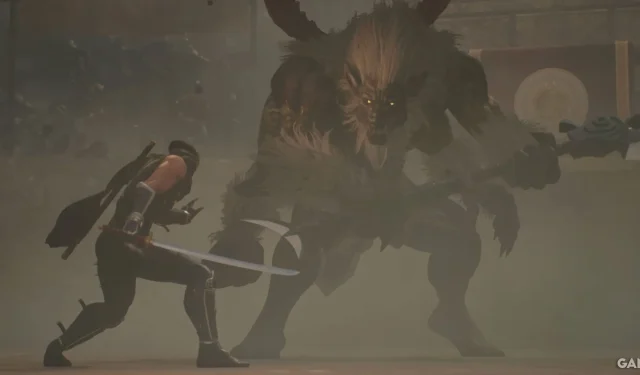
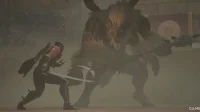
Volf Boss Fight:
Entering the Colosseum brings you face to face with Volf. The key to overcoming this hulking adversary is patience, much like in previous challenging encounters throughout the game. If you’re playing on normal difficulty or higher, take your time and leverage your defensive maneuvers to dodge Volf’s heavy swings.
Defeating Volf will reward you with the Eclipse Scythe, his signature weapon. However, be prepared for a furious onslaught of werewolves before the chapter concludes. Ultimately, rescue will arrive in the form of a helicopter, marking a definitive close to this thrilling chapter.