
Minecraft, a seemingly straightforward block-building game primarily designed for children, is known to elicit feelings of unease and fear among its players. Recognizing this eerie potential, the vibrant Minecraft community has developed several mods to amplify the horror elements of the game. One notable example is the Found Footage mod, which draws inspiration from the classic found footage horror film genre, transporting players into a chilling alternate reality.
Exploring the Found Footage Mod for Minecraft: Features and Installation Guide
What is the Found Footage Mod?
Before diving into the mod’s features, it is essential to understand the concept of “found footage.”This cinematic style typically involves storytelling through supposedly “discovered”video recordings made with low-quality camcorders, which adds a layer of authenticity and creepiness due to the grainy images and odd visual artifacts. The Found Footage mod captures this essence, creating an immersive horror experience within Minecraft.
To begin their journey, players must create a new world and intentionally suffocate themselves with any block. This unusual approach serves as a gateway into the modified experience. A common method to achieve suffocation in Minecraft is by placing sand blocks above the player, causing the blocks to fall and ultimately suffocate them.
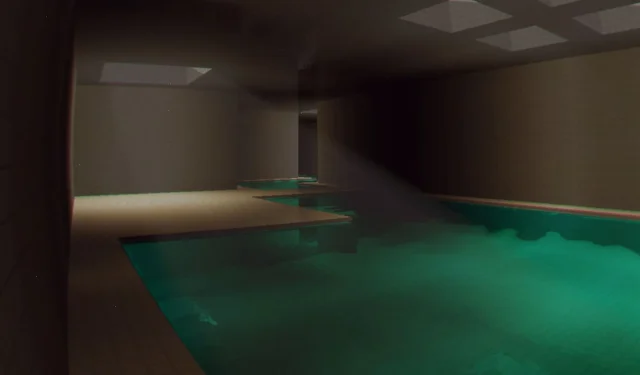
Upon suffocation, players are not eliminated; instead, they are teleported to an entirely different realm, known as the backrooms—a famously unsettling liminal space featured in various horror games. The mod presents multiple levels, starting with Level 0, which is the backrooms themselves, followed by:
- Level 1: The Habitable Zone
- Level 2: Pipe Dreams
- Level 3: The Poolrooms
Players must navigate through these four harrowing levels, striving to escape the eerie alternate world they have inadvertently entered. As they traverse the unsettling liminal spaces, they will encounter a variety of mysterious creatures and spine-chilling events. The ultimate goal is to find a way out and return to the familiar Minecraft universe.
How to Download and Install the Found Footage Mod
")
For those intrigued by the Found Footage mod, here’s a straightforward guide to downloading and installing it:
- First, download and install the Fabric modding API for Minecraft version 1.20.1, as it is the version supported by the mod.
- Visit the Modrinth website and search for the Found Footage mod.
- Once on the mod’s page, download the latest compatible version of the mod file for 1.20.1.
- To ensure the mod functions properly, also download necessary support mods, including Geckolib and Simple Voice Chat, specifically for version 1.20.1.
- Copy all mod files into the “mods”folder located in your root Minecraft directory. This is typically found at C:\Users\admin\AppData\Roaming\.minecraft.
- Open the official Minecraft game launcher and select the Fabric 1.20.1 modded profile.
- Launch the game, create a new world, and prepare yourself to explore the horror world of Found Footage after suffocating your character.