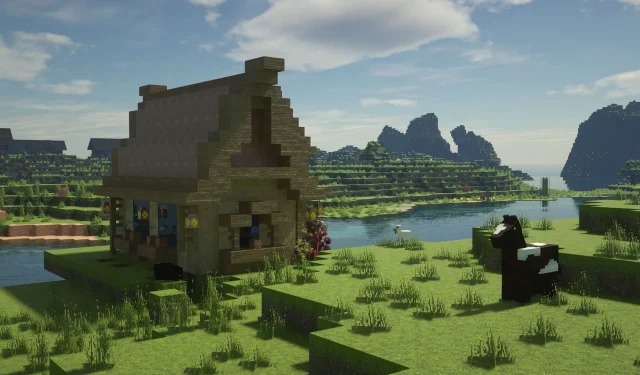

Minecraft has stood the test of time with its iconic blocky and pixelated graphics for over 15 years. While modern gaming trends lean toward ultra-realistic visuals, Mojang’s creative sandbox continues to charm players with its simple design. However, for those seeking a more immersive visual experience, numerous texture packs, including the well-regarded Optimum Realism, are available to upgrade the game’s aesthetics significantly.
How to Download and Utilize the Optimum Realism Resource Pack in Minecraft
Step 1: Required Modifications
")
To fully utilize the Optimum Realism resource pack, you’ll need several essential modding tools and APIs. Here’s a comprehensive list of the required components to ensure seamless operation:
Please note that while developers of Optimum Realism have begun releasing compatible versions for Minecraft 1.21.5, these are currently in beta. It is advisable to use the more stable mods for version 1.21.4, which are widely available and tested.
Step 2: Obtain Optimum Realism for Version 1.21.4
")
After successfully installing the required mods, you can find the Optimum Realism resource pack for version 1.21.4 available for download. Lower-resolution packs are accessible at no cost on the Modrinth website, while premium high-resolution options (ranging from 128x to 1024x) require a subscription via Patreon. You can choose to either invest in these premium packs or initially test the available free 64x version. Be sure to download the pack specifically for Minecraft version 1.21.4.
To install the resource pack, move the downloaded file to the resource packs folder located within Minecraft’s official directory, which typically resides here: “C:\Users\admin\AppData\Roaming\.minecraft\resourcepacks“.
Step 3: Activating and Testing the Optimum Realism Pack
")
With the mods and resource pack installed, launch the modified version of the game using the official Minecraft launcher. Navigate to the resource pack settings from the main menu and locate Optimum Realism on the left-side menu.
Enable the pack by moving it to the right-hand side panel. Additionally, ensure that connected textures and the glass pane culling fix settings are activated, which enhances compatibility and performance of the main resource pack.
Once you’ve successfully activated Optimum Realism, you can enter any world to experience the enhanced visuals. For an even more striking presentation, consider downloading the SEUS PTGI shader pack and enable it in-game.
By following these steps, you can enjoy a visually stunning Minecraft experience that breathes new life into your blocky adventures.