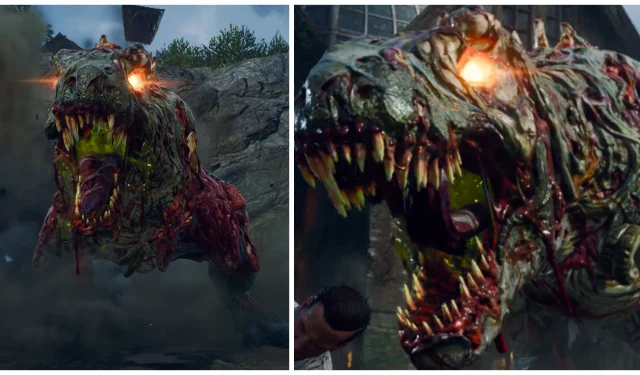
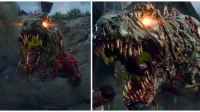

The Z-Rex serves as the formidable final boss in Shattered Veil, posing a serious challenge to those who dare to complete the main Easter egg. This zombified remnant of a Tyrannosaurus Rex employs an array of attacks, accompanied by hordes of undead minions. Thus, aspiring players will benefit greatly from strategic insights to conquer this encounter in Black Ops 6 Zombies.
With attacks that include biting and lunging, alongside the capability to consume players, understanding the Z-Rex’s behavior is imperative. Familiarizing oneself with its fighting techniques, combined with an effective loadout, can significantly enhance a player’s chances of surviving long enough to tackle the next map in Black Ops 6 Zombies.
Optimal Loadout for the Z-Rex in Shattered Veil
Top Weapons, GobbleGums, Field Upgrades, and Scorestreaks

Prior to entering battle against the Z-Rex, players must ensure they are equipped with the best possible loadout. This includes the right combination of weapons, perks, field upgrades, Scorestreaks, and GobbleGums. Let’s begin with weapon selection.

The Ray Gun Mark 2 is the weapon of choice for your primary armament, especially when upgraded to Tier 3 via Pack-a-Punch. This powerful weapon excels in dealing damage to both the Z-Rex and inbound zombies. It’s recommended to opt for the Ray Gun Mark 2-W, available at the Supply Depot, which boasts a wraithfire ammo type and a fully automatic firing capability. This weapon will be instrumental in the confrontation with the Z-Rex, while a secondary weapon should be something the player is comfortable with. For effective zombie elimination, consider using the dual-wielded GS45s dubbed Sally & Forth, or the Wunderwaffe DG-2, which can swiftly dispatch multiple foes.

A crucial aspect of the battle revolves around the Field Upgrade. Opt for Aether Shroud as it provides players a vital window where the Z-Rex and surrounding zombies become oblivious to your presence. This allows ample opportunities to heal or attack. To maximize this ability, players should select the Minor Augment, Extra Charge, granting two uses before needing a cooldown. The choice of Major Augment can vary according to playstyle; for solo players, Burst Dash is useful, while Group Shroud works well in cooperative setups.

Next, players should prepare a Scorestreak specifically tailored for the Z-Rex encounter. The Chopper Gunner is the top recommendation, obtainable for 2,500 Salvage at any Crafting Table upon reaching Level 45. Alternatively, it may be randomly acquired from defeating Elder Disciples. Furthermore, players can utilize remaining Salvage to purchase Stims (250 Salvage at Level 30) for quick healing, or Cymbal Monkeys (1,000 Salvage at Level 18) to distract nearby zombies, although the Z-Rex remains unaffected by them.

Regarding Perk-a-Cola, it is advisable to wait until Round 25 before purchasing them from Der Wunderfizz. Essential perks include Jugger-Nog for increased health, Speed Cola for rapid reloading, Quick Revive for speedy healing, Double Tap for faster firing rates, PhD Flopper for improved sliding, Stamin-Up for quicker sprinting, and Deadshot Daiquiri for enhanced accuracy on headshots.

Players can also carry three GobbleGums into the battle. While these can be acquired randomly and purchased through microtransactions, selecting the right ones can enhance your battle strategy. In our encounter with the Z-Rex, we utilized the Rare GobbleGum Power Keg, which provides a Full Power power-up to regain an Aether Shroud charge. Additionally, the Support Group Legendary GobbleGum proves advantageous by providing an ARC-XD, Mangler Cannon, Sentry Gun, and Mutant Injection, effective in the chaos post-Chopper Gunner. Lastly, Idle Eyes serves to distract all zombies for 30 seconds, although it does not apply to the Z-Rex itself.
Summary of Recommended Loadout:
| Primary Weapon | Ray Gun Mark 2-W (Tier 3 Pack-a-Punch) |
| Secondary Weapon | GS45s (Tier 3 Pack-a-Punch) |
| Armor | Tier 3 (3 Plates) |
| Support Streak |
|
| Field Upgrade | Aether Shroud |
| GobbleGums |
|
| Perk-a-Colas |
|
Strategies to Defeat the Z-Rex in Shattered Veil

The Z-Rex battle unfolds over four distinct phases, each introducing unique attack mechanics. Our phase-by-phase guide provides essential insights into handling each stage effectively. Players will receive valuable support from Richtofen, who will occasionally supply ammo, armor plates, and Self-Revive Kits during the fight.
Z-Rex Phase One

During the first phase, the Z-Rex moves about the arena, creating opportunities for players to take strategic action. To counter its movements, players should navigate between large rocks to impair the Z-Rex’s ability to turn, thereby slowing its advance. Watch for Toxic Zombies, as the Z-Rex often consumes them, leaving them exposed for players to attack. Targeting the Toxic Zombies lodged within the Z-Rex’s ribs delivers significant damage, acting as powerful critical hits. If no zombies are consumed, focus on the Z-Rex’s glowing eyes for critical damage opportunities. After inflicting around 25% damage, watch as the Z-Rex temporarily exits the arena, prompting players to eliminate a horde of zombies. Gather them up and aim for headshots to collect essence, which can then be spent on ammo from the resupply crates.
Z-Rex Phase Two

The second phase introduces a jump attack whereby the Z-Rex can land on players. This leap can be challenging to predict, so maintaining distance is crucial. Additionally, avoid the green gas pools scattered across the ground, which inflict damage and hinder movement. Should players find themselves trapped in the gas, employing an Aether Shroud can provide a critical escape route. Continuously fire at the Z-Rex with the Ray Gun Mark 2-W to chip away at its health. Once the Z-Rex reaches 50% HP, it will again exit the arena, allowing players to battle normal zombies and build essence once more.
Z-Rex Phase Three

Entering the third phase escalates the difficulty, as the Z-Rex becomes increasingly aggressive in targeting players. Expect additional gas puddles across the arena, which players should avoid while maintaining space from the creature. If the Z-Rex initiates a charge, utilize the spaces between large rocks to impede its momentum. This phase concludes once the Z-Rex’s health reduces to about 25%.
Z-Rex Phase Four

The fourth phase presents the most perilous challenge, with the Z-Rex relentlessly pursuing players for direct attacks. It will charge at players in an attempt to bite, dealing substantial damage. Players should always be on the move and utilize Aether Shroud when the Z-Rex approaches closely. It’s imperative to save the Chopper Gunner for this stage, as it can rapidly diminish the Z-Rex’s remaining health, particularly when targeting its glowing eyes. If players find themselves downed during the final phase, resist the temptation to self-revive immediately; instead, focus on inflicting damage on the Z-Rex beforehand.