

As players of the Dragon Quest 3 Remake gather the essential colored orbs, it’s time to prepare for an expedition to Mt. Necrogond volcano and venture into the ominous Maw of the Necrogond. This challenging series of encounters and dungeons will lead you to the invaluable Silver Orb, often considered the last orb required to unlock Ramia the Everbird.
Mt. Necrogond Volcano Walkthrough – Dragon Quest 3 Remake

Your journey begins with an encounter at the Volcano. Before you can enter this fiery area, it’s crucial to obtain the Mountaincleaver sword from the Shrine of Shackles. Once armed with this weapon, it’s time to rise to the challenge posed by the formidable Garboyle.
How to Reach Mt. Necrogond:

Launch your ship from Baharata and sail westward. Watch your map for a narrow river inlet on the northern side, just past a small desert, and navigate up the river to the left. Dock your vessel and make a brief trek to reach Mt. Necrogond.
The volcano presents just one major encounter: the battle with Garboyle.
How to Defeat Garboyle in Dragon Quest 3 Remake:

When facing Garboyle, come prepared for an intense battle due to its ability to unleash up to three attacks per turn. In our encounter at the Dragon Quest difficulty level, it utilized four main attacks:
- Attack Attacker: This ferocious strike inflicts significant damage while also reducing the attack power of its target.
- Frizzle: A moderate fire spell.
- Burning Breath: A hazardous cloud attack that could paralyze your entire party.
- Dazzle: A spell that confuses your party, reducing your control over affected characters.
Preparation is key; ensure your equipment has defenses against paralysis and confusion. The Banishing Bell is an excellent choice here. Additionally, Garboyle is particularly susceptible to both Crack-based (Ice) and Zap-based (Electricity) spells.
Utilizing spells like Zapple or Lightning Slash can turn the tide in your favor. If you deploy a spell-caster, Kacrack should be at your disposal. In our fight, focusing on attack strategies compromised overall party survival; balancing between damage and support roles is essential for success.
Following your victory over Garboyle, explore the northwest corner of Mt. Necrogond for a chance to find one of the game’s friendly Magmalice Monsters, either Alice or Bernie, based on your order of discovery.
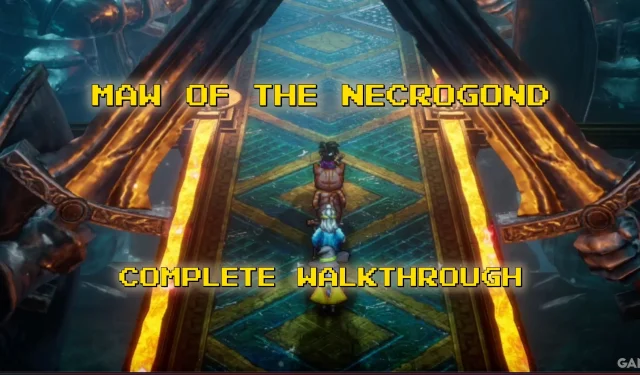
Maw of the Necrogond B1 Walkthrough – Dragon Quest 3 Remake

How to Reach the Maw of the Necrogond:
Once you conquer Garboyle, an eruption from Mt. Necrogond will create a new passageway of volcanic rock leading towards the Maw of the Necrogond. The map will display a long, narrow route meandering south between snow-capped peaks, culminating at the dungeon’s entrance.
Be cautious as you navigate; approximately two-thirds of the way along the path, you’ll encounter toxic purple zones that can harm your party. Utilize the Safe Passage spell to bypass these areas and collect any sparkly loot.
Before heading west into the cave, observe a hidden area on a plateau that can only be accessed post-unlocking Ramia the Everbird. This spot contains a Stealth Suit and a Thief’s Turban.
Maw of the Necrogond B1 Main Path:

Entering the Maw of the Necrogond brings you to the first basement level, or B1. There are minimal significant events on this level; cross the bridge and ascend the stairs to reach the first main level, L1.
Maw of the Necrogond L1 Walkthrough – Dragon Quest 3 Remake

Maw of the Necrogond L1 Main Path:
The first significant level of the Maw challenges players with new enemies. Entering from the southeast corner, your objective is to reach the southwest corner while battling various foes you are yet to encounter.
While navigating L1, follow the lower section of the map for the easiest path. However, those in search of treasure should explore thoroughly to uncover hidden rewards.
All Treasure on Maw of the Necrogond L1:
- Treasure 1: Full Moon Ring
- Treasure 2: Thunderbolt Blade
- Treasure 3: Sage’s Elixir
- Treasure 4: Spiked Armor
Maw of the Necrogond L2 Walkthrough – Dragon Quest 3 Remake

Maw of the Necrogond L2 Main Path:
Upon reaching the second level, also known as L2, you’ll discover various regions that require multiple map consultations. The map displays two exits: the northeastern exit and the southeastern passage beyond areas riddled with deep holes.

The main path leads towards the southeastern exit, taking you to L3, while the first exit on the right side of the loop brings you to an alternate section of L2 (referred to as L2-B). This area loops back if you continue eastward but is worth the visit due to a Friendly Monster encounter.
Once you exit L2-B, return to L2-A and navigate past the large openings. Falling into one of these pits will send you back to L1. Ascend the ladder in the southeast corner to continue to L3. Note that L2-C connects only from L3, and details will be included in that section.
All Treasure in Maw of Necrogond L2:
L2-A:
- Treasure 1: Angel Bell
L2-B:
- Treasure 1: This chest is a Mimic
Maw of the Necrogond L3 Walkthrough – Dragon Quest 3 Remake

Maw of the Necrogond L3 Main Path:
The third level presents a challenge where you need to drop down to a lower area to access the exit leading to L4. Referencing the map, you’ll find a central path. At the end of this passage, take the fall to access L2-C, which is crucial to reaching the appropriate part of L3.

When on L2-C, you’ll notice both northern and southern exits. The southern exit leads to the lower route on L3, guided towards Treasure 2, while the northern exit leads to the northeastern segment that accesses L4.

Upon reaching the northeastern path of L3, be on the lookout for a shrine located just before the exit. Enter this sanctuary to replenish your party’s HP and MP.
All Treasure on Maw of the Necrogond L3 and L2-C:
L2-C:
- Treasure 1: Assassin’s Dagger
- Treasure 2: Mini Medal
- Treasure 3: Black Bandanna
L3:
- Treasure 1: 3,024 Gold Coins
- Treasure 2: Mythril Helm
Maw of the Necrogond L4 Walkthrough – Dragon Quest 3 Remake

All Treasure on Maw of the Necrogond L4:
The fourth level is notable for its size, hosting a considerable number of encounters as you make your way to the exit. It’s advisable to make use of spells like Holy Protection from the Hero or Padfoot from a Thief to facilitate quicker navigation.
- Treasure 1: Magic Shield
- Treasure 2: Magical Robes
- Treasure 3: Phial of Magic Water
- Treasure 4: This treasure is a Mimic
- Treasure 5: Yggdasil Leaf
- Treasure 6: Thinking Cap
Maw of the Necrogond L5 Walkthrough – Dragon Quest III Remake

The fifth and final level of the Maw consists solely of a bridge leading directly to the Necrogond Shrine.
Necrogond Shrine Walkthrough – Dragon Quest 3 Remake

Upon exiting the Maw of the Necrogond, proceed east until you reach a small church situated atop a hill: the Necrogond Shrine. Enter the shrine and converse with the prominently placed NPC.
Within the Necrogond Shrine, there are three treasures to collect:
- To the east of the shrine, next to a barrel, discover a Dragon Scale.
- Inside the shrine, search behind the NPC for hidden treasures: a Mini Medal and a Seed of Life.

Engaging with the NPC will grant you the final orb—the Silver Orb. With all six orbs collected, you’ll be ready to set sail to Rimland, where the Shrine of the Everbird awaits, providing access to the lair of Archfiend Baramos.
All Monsters in the Maw of the Necrogond – Dragon Quest 3 Remake

| Monster Name | Known Weakness |
|---|---|
| Minidemon | Unknown |
| Armful | Frizz (Fire), Boom (Explosive) |
| Troll | Unknown |
| Silhouette | Varies (Like Shade) |
| Infanticores | Unknown |
| Freezing Fog | Frizz |
| Wyrtoise | Unknown |
| Goodybag | None |