The From Spark to Flame mission serves as a pivotal main story quest in Assassin’s Creed Shadows, introducing players to the character Naoe and marking the transition to an expansive open-world experience. Following earlier quests that confined gameplay to specific tasks and locations, this mission fully opens the map, allowing players to explore freely.
Previously, Naoe experienced a traumatic attack by masked assailants that resulted in her father’s tragic death. Following this devastating event, she sought refuge in the Makinoodera temple, where Sorin and Junjiro assisted in her recovery. As she regains her strength, haunting memories of her father fuel her desire for revenge. Thus, her journey commences in the From Spark to Flame mission.
The following guide offers a thorough walkthrough to help players navigate this mission effectively.
Walkthrough for the From Spark to Flame Quest in Assassin’s Creed Shadows
Naoe begins her journey by bidding farewell to Sorin and Junjiro, informing them of her intention to travel to Settsu to visit her family friend, Tomiko.
As the cutscene concludes, the gameplay begins:
Make Your Way to Tomiko
Your first objective is to head south towards Tomiko’s residence. Given the lengthy journey ahead, it’s advisable to mount your horse. Along the way, players will encounter numerous viewpoints that not only reveal the surrounding landscape but also unlock fast travel points. Taking the time to explore these vantage points allows for deeper immersion in the game’s world and uncovers hidden secrets.

Upon finishing your exploration, continue your journey south until you arrive at Tomiko’s homestead. Approach her for a cutscene to initiate.
During this cutscene, Tomiko asks about Nagato, and Naoe’s silent gesture confirms the tragic news of his passing. Empathetic to Naoe’s grief, Tomiko invites her inside, offering a drink in memory of Nagato.
Naoe shares her harrowing account of the attack, detailing that eleven masked samurai perpetrated the assault. While recuperating at the temple, she practiced her drawing skills, sketching the faces of her attackers, which she presents to Tomiko.
Fired with determination, Tomiko encourages Naoe to not only confront the masked samurai but also to challenge the forces that enable them. This prompts an important dialogue choice:
- I am ready.
- If I must…
Choose the response that resonates with you; regardless of the selection, Tomiko emphasizes the necessity of vengeance but also stresses the importance of gathering allies and resources. She offers her home and support, affirming that Naoe can utilize everything available to her.
Tomiko reveals her own painful history of loss due to war and insists that what she has is now also Naoe’s, contingent upon Naoe’s promise to enact revenge. Recognizing the need to rebuild, Naoe agrees, and they resolve to start collecting supplies.
Collect Resources for the Kakurega
This segment of the mission doubles as a tutorial on resource gathering and upgrading your hideout. Required materials are scattered across Tomiko’s grounds. Activate Observation Mode (L2 on PlayStation 5) to highlight interactive objects marked by blue indicators.
- Exit Tomiko’s house and head west towards the stable.
- On the right side of the stable, collect stones.
- On the left side, gather wood and crops.
- Utilize Observation Mode again to detect additional crops further southeast of the stable.
Construct the Kakurega
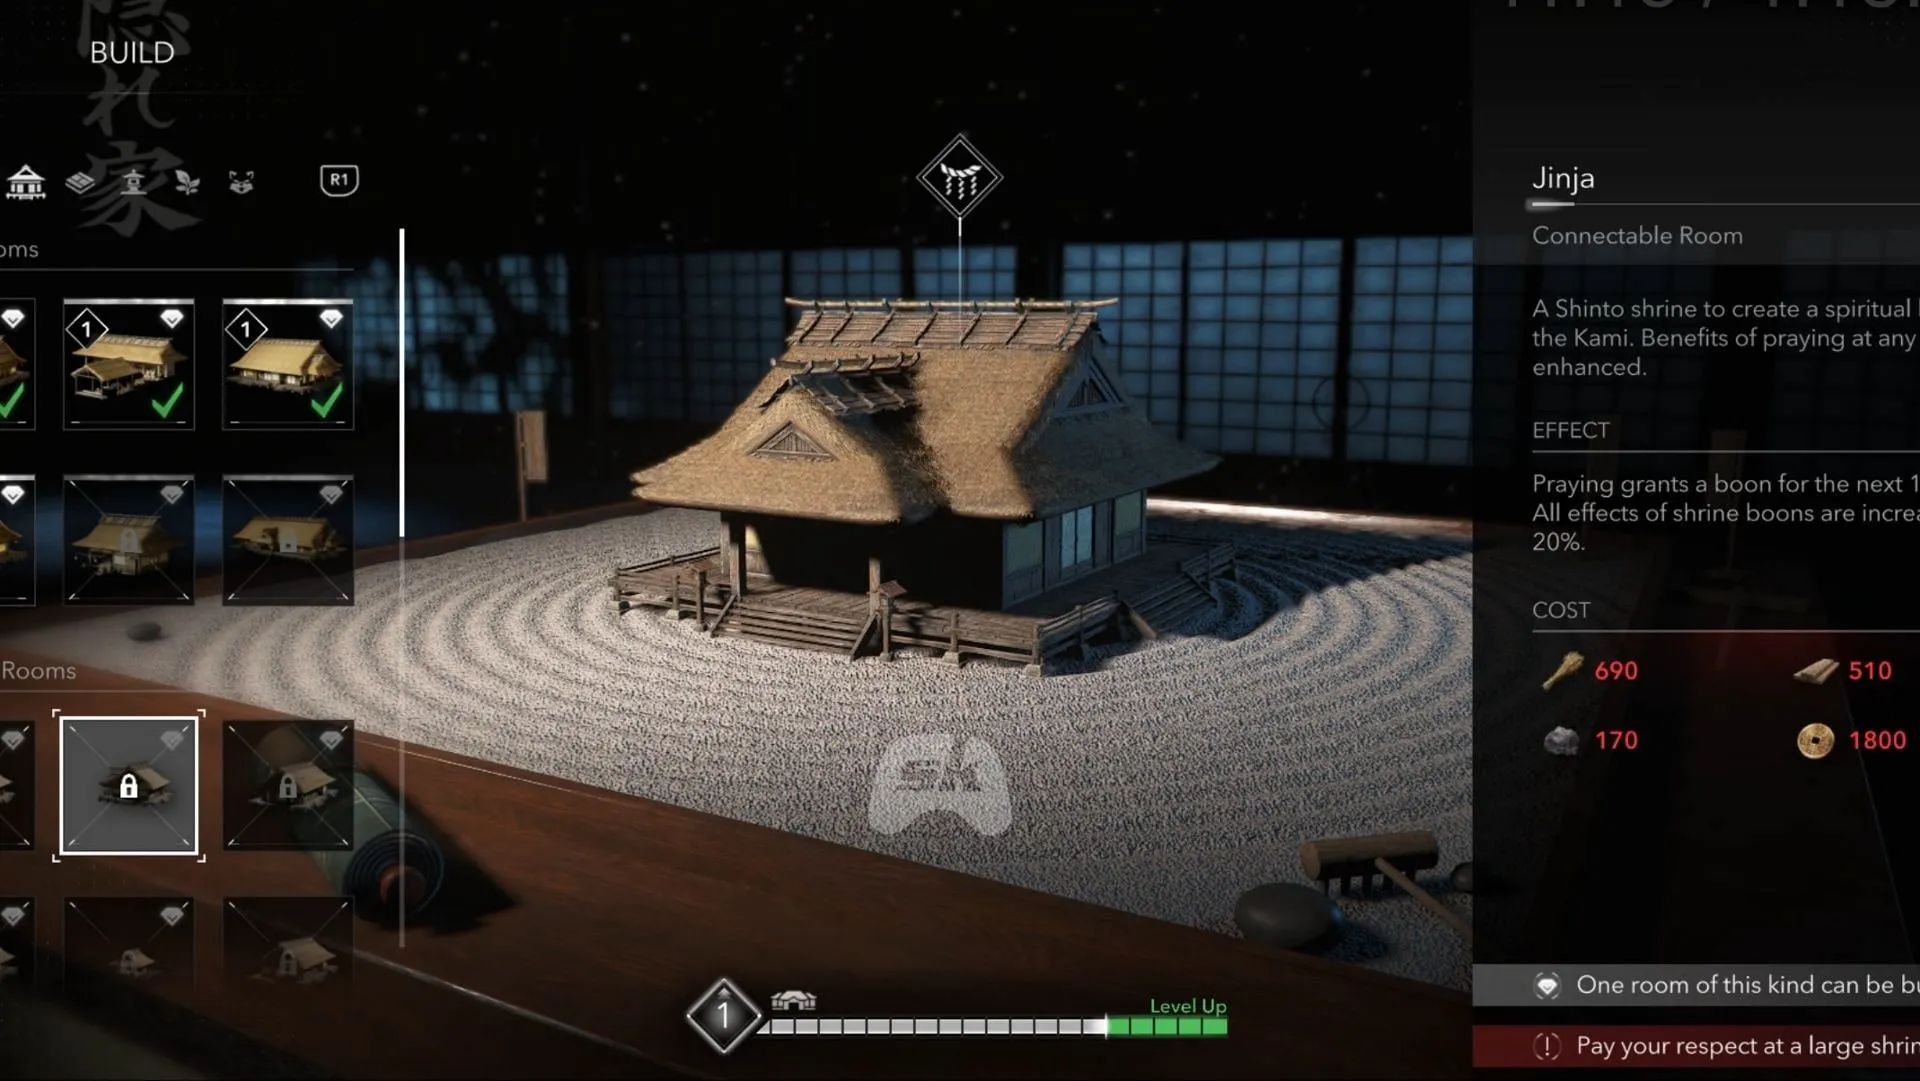
Once you have harvested the necessary materials, return to Tomiko’s house. Inside, you will find a scale model of the property. Interact with it to access the Hideout Menu.

In the menu, you can expand and upgrade your base. Each new room contributes various advantages to your hideout’s capabilities. Navigate to the Main Rooms section to facilitate fast travel, access seasonal contacts, and manage your supplies.
To construct the Kakurega, you’ll require the following materials:
- 60 Crops
- 30 Wood
- 5 Rocks
Having collected these resources, select an empty area on the model to establish the Kakurega. Some minor customizations are possible, although options will be somewhat limited at this early stage.
Exiting the hideout menu triggers a cutscene where Sorin and Junjiro arrive. Sorin reflects on his stay at Makinoodera, noting that while he felt he was contributing positively, witnessing Naoe’s determination made him realize he had been escaping reality. He announces his intention to embark on a personal pilgrimage.
Conversely, Junjiro opts to remain with Naoe, pledging to assist with cooking, chores, and horse care. This leads to another important dialogue choice:
- This is no place for a child.
- You can stay, Junjiro.
Opting for the second choice is advisable, as it prompts Tomiko to comment on their growing circle. Naoe counters by reminding her about the necessity for allies, positioning Junjiro as their first recruit.
Tomiko then shares new intel derived from Naoe’s sketches, providing valuable insights into two of the masked enemies.
Upon the conclusion of the cutscene, you have successfully completed the From Spark to Flame main quest in Assassin’s Creed Shadows.
This guide encapsulates everything you need to know about the From Spark to Flame quest. For detailed strategies and more insights, be sure to check the full walkthrough.


