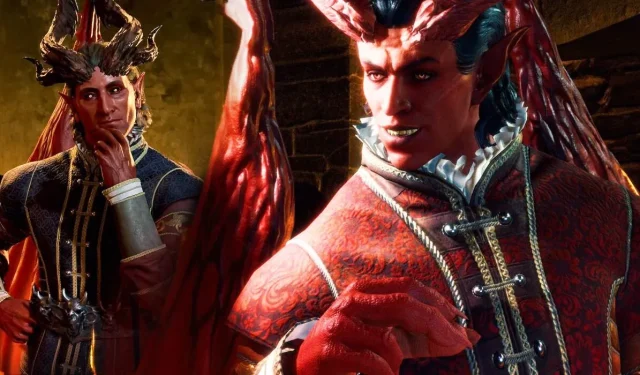


Choosing whether to strike a deal with Raphael in Baldur’s Gate 3 presents players with a conundrum. The cambion offers enticing promises: fulfilling the party’s ambitions, assisting Astarion with his personal journey, and most critically, claiming he has the power to eliminate Tav’s ill-fated tadpole infestation. However, the authenticity of these offers remains dubious, similar to Auntie Ethel’s deceptive assistance earlier in the game. Despite this, Raphael’s confident demeanor and apparent might make his proposal particularly alluring.
[Warning: This article contains spoilers for a potential ending of Baldur’s Gate 3.]
From their initial encounter, players may feel a twinge of doubt regarding Raphael. As a cambion, he reveals his true identity as a product of a union between a human and a devil. His candidness could be seen as a sign of trustworthiness, especially since all he seeks in return for curing Tav’s malady is the Crown of Karsus from the Elder Brain. Yet, his cheerful disposition leaves players with a lingering sense of unease, amplified by the warnings from companions about the nature of fiends.
Consequences of Accepting Raphael’s Deal in Baldur’s Gate 3
Advantages and Disadvantages of Aligning with Raphael

One immediate consequence of accepting Raphael’s offer is that none of the core party members are pleased. Tav loses approval from characters like Astarion, Gale, Karlach, Lae’zel, Shadowheart, and Wyll. Although it remains possible to mend these relationships later, the initial discontent is significant. After the party signs the contract, Raphael bids farewell and vanishes, leaving them to ponder the implications of their choice.
Interestingly, there are few short-term repercussions following the deal. As the narrative advances through Acts One and Two, the party resumes their adventures exploring the Underdark, Githyanki Crèche, and the Shadow-Cursed Lands, eventually returning to Baldur’s Gate. During this time, they reunite with Raphael at Sharess’ Caress, where he insists that, to secure a lasting cure, they must liberate the githyanki prince Orpheus from his imprisonment in the Astral Plane. He provides them with the Orphic Hammer, a key tool for breaking Orpheus’ chains.
It’s vital to note that Raphael’s claims hold some truth. Freeing Orpheus is indeed one method for eliminating the parasitic tadpole, but this route does not culminate in the most favorable outcomes. Moreover, accepting Raphael’s help may lead to greater misfortunes, such as preventing Gale from presenting the Crown of Karsus to Mystra, which ultimately closes off another potential resolution to his storyline.
By freeing Orpheus, players will gain the support of both him and the githyanki army in the climactic battle—potentially making the confrontation easier—but at the cost of losing the Emperor’s alliance.
For the final chapters, securing a Mind Flayer ally becomes paramount. This can be either the Emperor, the liberated Orpheus, or a character afflicted by a tadpole. Notably, Karlach might volunteer for this role, offering a chance to escape her servitude in Avernus. However, the transformation isn’t without its challenges.
Lae’zel’s reaction to these dynamics can diverge considerably based on her relationships and progress with Vlaakith; she could potentially oppose the group. A successful persuasion check could avert conflict, but failure might necessitate eliminating her. Regardless, the use of the Orphic Hammer often demands the sacrifice of a party member, and the extent of this sacrifice can vary depending on their bonds with Tav.
Consequences of Accepting Raphael’s Deal
Important Spoilers Ahead

As a further consequence of accepting his deal, the party must relinquish the Crown of Karsus, leading to a grim epilogue that signals dire prospects for the Forgotten Realms. Here, Raphael speaks directly to Tav, describing his growing power and military campaigns. His ambitions stretch toward Avernus, where he plans to overthrow its ruler, Zariel, and conquer not only the Nine Hells but potentially the entire universe as well.
This conclusion, while not explicitly illustrated, casts a dark shadow over the player’s choices, presenting one of the most unfavorable endings in Baldur’s Gate 3. Although it may not tangibly affect gameplay, it certainly doesn’t provide a satisfying closure, making it a niche conclusion for those favoring malevolent paths.
What Occurs When You Decline Raphael’s Deal in Baldur’s Gate 3?
Benefits and Drawbacks of Refusing Raphael

Rejecting Raphael’s terms has minimal negative consequences. While he may show some disappointment, the party gains universal approval from all companions present. This decision frees them to explore various other cures for the Illithid infection. Although not every option is reliable or safe, Raphael’s deal is certainly neither the only nor the best available choice.
Additionally, players will encounter opportunities to accept Raphael’s offer later in the game. If they decline him in Act One, they can opt for his assistance again in Act Two at Last Light Inn, and yet again in Act Three at Sharess’ Caress. The only way to ensure permanent rejection is by eliminating him.
Still, players can find alternative cures and even ally with the Emperor by delivering three Netherstones to earn his support. Should they opt to free Orpheus during their first encounter with the Emperor, this path yields yet another undesirable ending.
Players can always return to the House of Hope to claim the Orphic Hammer later, regardless of their choices concerning Raphael’s initial proposal. Though not as straightforward as signing a contract, the quest to infiltrate the House of Hope presents significant challenges but also substantial rewards.
Strategies for Betraying Raphael in Baldur’s Gate 3
Options for Backing Out of Raphael’s Deal or Acquiring the Orphic Hammer

Whether motivated by regret over their decision or a desire for the Orphic Hammer, the methods to betray Raphael remain consistent. He keeps both the hammer and the corresponding contract secured within his House of Hope. To access this area, players must perform an infernal ritual, possibly requiring bribery or blackmail of Helsik, proprietor of the Devil’s Fee. Convincing Helsik to assist may also involve the Gauntlets of Hill Giant Strength, or they can intimidate her using evidence from the upstairs attic.
Alternatively, players can attempt to conduct the ritual themselves, which necessitates an unusual assortment of items, including a skull, incense, a diamond, an Infernal Marble, and a Coin of Mammon. While many items are rare, the two most difficult components to acquire lurk within Helsik’s heavily secured chambers.
Upon successful entry, players can try to rescue Hope, the house’s original owner, who can lend support during their exploration. Successfully aiding her provides disguises to bypass combat. If players fail, they can obtain Debtor’s Attire from various wardrobes throughout the residence. From this point, access to the archive leads to a confrontation with the Archivist for an invitation to Raphael’s boudoir through a Deception check, or by stealing it directly.
Within the Impervious Sphere discovered in the archive, the item contained varies based on the player’s prior interactions with Raphael; if the contract has been signed, they will find it here—if not, the Orphic Hammer awaits.
Once reaching Raphael’s boudoir, players must deal with Haarlep, an incubus resembling Raphael. They can either seduce or eliminate Haarlep to gain the key to the safe, which is accessible upon disarming a trap hidden behind a painting. Inside the safe, they’ll uncover vital notes required to dispel the Impervious Sphere, allowing them to seize either the contract or the hammer.
While exploring, I highly recommend collecting valuable items throughout the House of Hope, including notable equipment like the Amulet of Greater Health and various treasures within the vault. These are among the best rewards the game has to offer.
However, players should be prepared for a final ambush by Raphael during their exit, which escalates into a challenging boss fight. His combat capabilities include an Armor Class of 25 and a health pool of 666. It is crucial to ensure the party is well-prepared and to exploit his vulnerability to radiant damage. Focus first on the four Soul Pillars, which enhance Raphael’s abilities and present a significant threat.
The Case for Rejecting Raphael in Baldur’s Gate 3
Avoid Making a Deal with the Devil

In light of the numerous implications, players should consider refraining from accepting Raphael’s deal in Baldur’s Gate 3. By initially turning him down, they can avoid adverse consequences and maintain access to the same gameplay objectives without being locked out of quests—so long as they pursue the alternative methods for acquiring the Orphic Hammer.
Engaging with the House of Hope quest—regardless of whether they struck a deal with Raphael—offers significant rewards, such as a chance to cultivate Yurgir’s favor for potential assistance in future battles. Furthermore, unfolding this quest deepens understanding of Raphael, enriching the overall narrative.
The endings involving Orpheus may not prove ideal for every player. By choosing to reject Raphael, numerous alternative endings remain viable, including potential alliances with the Emperor or eliminating Orpheus altogether. Accepting Raphael’s deal, however, undeniably steers players towards an unfavorable conclusion, where the power-hungry cambion threatens to dominate the multiverse.
Moreover, declining Raphael should grant approval from each Origin character, enhancing romance prospects and increasing camaraderie. Ultimately, the decision rests with individual players; while siding with Raphael might seem advantageous in an evil-oriented playthrough, most players will find it prudent to avoid making a pact with him.