

Mastering the ‘Quick Escape’ Trophy in Atomfall
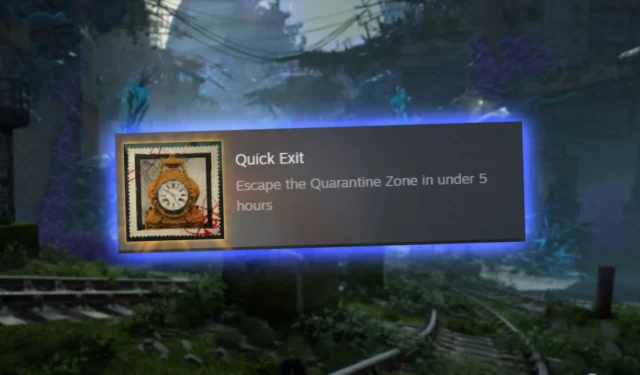
Atomfall presents players with a total of 36 achievements, but one specific trophy, known as ‘Quick Escape’, stands out due to its challenging nature. To unlock this trophy, players must complete the game in under five hours. While this may seem daunting at first, with the right strategy and focus on key objectives, achieving this speedrun completion becomes much more feasible.
Remarkably, with optimal efficiency, skilled players can finish Atomfall in less than an hour, making it a rewarding achievement for those who can navigate the game adeptly.
This guide includes major spoilers for the game’s conclusion, locations, characters, and various story elements. It’s advisable to experience the game fully before attempting to obtain the ‘Quick Escape’ trophy through a speedrun.
Speedrun Essentials and Checkpoints

For those looking to speedrun Atomfall, the collection of only seven essential items will suffice: five Atomic Batteries, the Signal Redirector, and Dr. Holder’s infection resistance buff. Obtaining Strange Tonics is unnecessary if you swiftly navigate through infection-laden areas.
While several items and areas are essential for acquiring the Atomic Batteries and unlocking the Windfall’s Crate (which contains the Signal Redirector), these seven items are fundamentally all that is required to complete the game.
Be prepared: to expedite your progress, you’ll encounter numerous enemies, including friendly NPCs, that you must eliminate to quickly gather the necessary items.
Below is a detailed list of Atomfall speedrun checkpoints, providing an optimized route to gather all seven items efficiently. Following this guide can help you achieve the speedrun accomplishment with ample time to spare, making it manageable to finish within the five-hour requirement.
| Objective | Location/Coordinates | Approximate Time |
|---|---|---|
| Kill Molly (Battery 1) | Slatten Dale Trader Camp (26.4E, 79.1N) | 00:03 |
| Kill Vicar (Battery 2) | St Katherine’s Church in Wyndham (33.0E, 78.8N) | 00:05 |
| Wyndham Village Interchange Entrance | South Wyndham Village (33.8E, 78.3N) | 00:07 |
| Protocol Workshop & Windfall Key | North Slatten Dale (38.0E, 77.4N) | 00:11 |
| Downed Robot (Battery 3) | Northwest of Nora’s Barn (41.3E, 78.2N) | 00:12 |
| Kill Nora (Battery 4) | Nora’s Barn, Skethermoor (41.8E, 77.5N) | 00:12 |
| Windfall’s Crate & Signal Redirector | Protocol Field Bunker (41.3E, 71.9N) | 00:14 |
| Skethermoor Interchange Entrance | Skethermoor Prison (39.6E, 73.1N) | 00:16 |
| Central Processor (Battery 5) | Central Interchange | 00:17 |
| Power Data Store Alpha | Inside Wyndham Interchange Entrance | 00:18 |
| Church Cellar Key in Medical | Medical wing below Interchange | 00:22 |
| Infection Resistance Buff | Cellar below St Katherine’s Church | 00:25 |
| Slatten Dale Interchange Entrance | Northeast Slatten Dale (31.0E, 77.8N) | 00:28 |
| Power Data Stores Charlie and Delta | Inside Skethermoor Interchange entrance | 00:30 |
| Power Data Store Bravo | Inside Slatten Dale Interchange entrance | 00:30 |
| Power Central Processor | Central Interchange (requires Signal Redirector) | 00:31 |
| Destroy Oberon | Oberon Dig Site in the Windscale Plant | 00:35 |
| Escape | Starting bunker in Slatten Dale (24.3E, 71.0N) | 00:38 |
Walkthrough for Quick Escape Trophy
Step-by-Step Guide to Speedrun Atomfall in Under 5 Hours
https://www.youtube.com/watch?v=Mqbl3dx22hw
Step 1: Eliminate Molly (Battery 1)
Begin your journey by navigating to the northwestern section of Slatten Dale via the path leading across the clifftop until you reach Molly’s trader camp. After defeating Molly, loot her for a Flashlight, Club, and Atomic Battery, and proceed into Wyndham Village.
Step 2: Take Down the Vicar (Battery 2)
Upon arriving at St. Katherine’s Church, eliminate the Vicar. Acquire the Vicar’s Key and head upstairs to access a sealed chest with another Atomic Battery.
Step 3: Enter Wyndham Village Interchange
Move towards the back of St. Katherine’s Church and jump over the fence just east of the churchyard to locate the Wyndham Village Interchange entrance. Enter, unlock the door, and access the Central Processor, but do not linger. Instead, return to Wyndham Village and continue towards Skethermoor.
Step 4: Protocol Workshop & Collect Windfall Key
Upon entering Skethermoor, stick to the left-hand wall until you find a Protocol bunker. Go into the Protocol Workshop and navigate to the right, then left down the hallway until reaching a bathroom. Sneak past the final stall, ascend into the gap, and obtain the Windfall Keycard from the corpse.
Quickly raid the B.A.R.D. crates in the following room for weapons, ammo, and healing supplies, then exit before enemies can retaliate.
Step 5: Loot Downed Robot (Battery 3)
Head straight east to find a sparking, downed B.A.R.D. Robot located northwest of Nora’s Barn. Jump on the robot to evade leeches and loot it for the Atomic Battery before progressing into Nora’s Barn.
Step 6: Defeat Nora (Battery 4)
Navigate through the tripwires to the southeast of the downed robot and enter Nora’s Barn. Eliminate Nora and collect her Atomic Battery. Exit and proceed southwest, passing the phone box to discover the Protocol Field Bunker, which is heavily defended.
Step 7: Acquire Windfall’s Crate & Signal Redirector
To minimize detection by enemies, head south past the phone box outside the Protocol camp, then jump over the hill directly south of the main entrance. If you act quickly, you can avoid attracting soldiers’ attention.
Move west into the field where a fenced bunker monitored by a guard awaits. Enter the bunker, sprint down the hall, turn left, and open the door to discover the Windfall’s Crate containing the Signal Redirector.
Step 8: Enter Skethermoor Interchange
Carefully go around the minefield to the west of the Protocol Field Bunker, remaining cautious of the patrolling B.A.R.D. Robot to the north of Skethermoor Prison. This robot wields flamethrowers, so maintain a safe distance.
Access Skethermoor Prison through the northern entrance, dodging gunfire from soldiers and sentry turrets. As soon as you pass through the inner fence, turn left to locate the Skethermoor Interchange Entrance, being mindful of any guarding B.A.R.D. Robots. Quickly enter the Interchange to avoid death.
Inside, eliminate two soldiers with headshots, then descend the ladders at the back of the lobby to find the Skethermoor Interchange entrance just beyond a closed door.
Step 9: Collect Central Processor Battery (Battery 5)
Enter the Central Processor and retrieve the battery next to a dead scientist close to the switchboard. Insert one of the Atomic Batteries into the power slot to the right. Then, exit through the previously unlocked Wyndham Village shortcut.
Step 10: Power Data Store Alpha
After activating the Interchange’s central control room, you can unlock all four Data Stores. Start with Data Store Alpha, known for being the most challenging since it’s filled with infection spores. Be wary of two explosive plants blocking the Atomic Battery slot.
Shoot both explosive plants from a safe distance, then exit and use any bandages and First Aid Kits collected to heal up before dashing back in to power up Data Store Alpha with an Atomic Battery. Exit quickly to avoid prolonged infection exposure; though the room will eventually vent, take care not to linger.
Step 11: Find Church Cellar Key in Medical
With Data Store Alpha powered, access the Medical wing of the Interchange. Rush inside, beware of Thralls, and turn right, then right again to locate the Church Cellar Key beside a deceased scientist.
Step 12: Acquire Infection Resistance
Open the Forgotten Cellar in the church crypt to encounter Dr. Alan Holder. Avoid conversing with him; instead, simply collect the Infection Resistance manual from the table in the room and then return to Slatten Dale. This passive resistance will allow you to bypass Strange Tonics when navigating the spore-infested initial area of the Windscale Plant.
Step 13: Enter Slatten Dale Interchange
Re-enter Slatten Dale from Wyndham Village and head east across the railyard and up the quarry steps to locate the Interchange entrance bunker. Unlock this entrance to gain access to the final two Data Stores.
Step 14: Power Data Stores Charlie, Bravo, & Delta
Upon re-entering the Interchange via Slatten Dale, unlock Data Stores Charlie and Bravo by inserting Atomic Batteries into them, then cross over to the Central Processor room to power up Data Store Delta. Finally, return to the Central Processor once you have successfully powered all four Data Stores.
Step 15: Activate the Central Processor & Enter the Windscale Plant
After securing access to all entrances and empowering the Data Stores, use your Signal Redirector on four switches located underground at each entrance to activate the Central Processor. Wait for the processor to initialize, which will lead to an unlocked passage to Oberon adjacent to the control panel.
Upon entering the Windscale Plant, answer the ringing phone to receive your next mission: destroy Oberon.
Step 16: Navigate Windscale
Having gained the Infection Resistance from Dr. Holder, sprint through the spore-filled opening of the Windscale Plant. Veer to the right to steer clear of carnivorous plants, and advance through the cleaner second section of the Windscale Plant.
Utilize the left path for a simpler route free of enemies other than some easily outrun Ferals. Continue until you reach the Oberon Dig Site.
Step 17: Neutralize Oberon
Reach the control room in the Oberon Dig Site and activate the “Self-Destruct”mechanism. Quickly exit the site and race back to the Windscale Plant entrance, evading the Druids and Mother Jago aiming to thwart your escape.
Step 18: Return to Slatten Dale Starting Bunker
After defeating Oberon, interact with the ringing telephone to receive your final directive: return to the starting bunker at the south of Slatten Dale. Leave the Interchange through the Slatten Dale entrance, steering clear of every Outlaw or Druid in your path. By maintaining your distance, you should manage to navigate without issue.
Finally, enter the bunker, rushing past the initial scientist (now a Thrall), and locate the room where your journey commenced. Once the concluding cutscene plays, you’ll successfully unlock the ‘Quick Escape’ achievement and complete your Atomfall speedrun!