
Other Voices, Other Looms serves as the engaging second chapter of South of Midnight. Following her daring escape from her grandmother’s attic, Hazel is fueled by determination to uncover secrets that may aid in rescuing her mother. While the first chapter unfolds in a more linear fashion, this chapter introduces a heightened level of action and complexity.
This guide provides a comprehensive overview of Chapter 2, encouraging players to harness newfound abilities for combat scenarios.
Disclaimer: This section contains major story spoilers.
The Journey Begins: Other Voices, Other Looms
")
Having evaded the perils of Flood Mansion in the previous chapter, Hazel is eager to embark on her quest alone, unwilling to wait for assistance to save her mother. Unlike typical action-adventure titles, South of Midnight enriches its gameplay with intricate lore, demanding players actively engage to piece together its narrative.
If you find yourself uncertain about your next steps, utilize the Guiding Strands feature to navigate your path. You’ll eventually encounter a blockade of wooden brambles, prompting you to seek alternative routes. By adjusting your camera to the right, you’ll discover some rocks forming ledges for climbing.
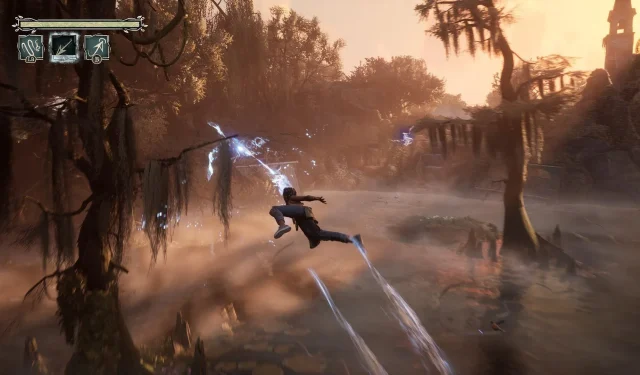
Upon overcoming this hurdle, you will be propelled into your initial combat scenario, confronted by various thorny environmental obstacles that you should avoid.
")
Your first real combat encounter features the Ravager Haint, providing an excellent opportunity to test your hooks. This foe is agile and powerful, yet Hazel can enhance her attacks to maximize damage output. Alternatively, a more cautious approach can be adopted by delivering damage whenever you find the opportunity.
Defeating the Ravager Haint allows you to unravel it to recover any lost health. However, additional enemies will spawn thereafter, necessitating their defeat to progress through the storyline. This segment of the game serves as an introductory tutorial to combat mechanics, deeply immersing you in the unfolding plot.
Discovering the Broken Well
")
After vanquishing all Haints in your vicinity, the arena will open up, directing your attention to a narrow crevice. Investigating the strange music emanating from this location is essential for advancing the narrative. Hazel can slip through this small opening near a broken well, descending into a new path where climbing ledges will lead you onward.
Some platforming is necessary to traverse, eventually leading you to a small area housing a contraption. Here, a cutscene reveals Hazel’s acquisition of the distaff, as she witnesses ghosts sharing tales of their past journeys, prompting her to pursue them for further revelations.
")
Your journey also introduces floofs, the game’s currency for upgrading abilities. Continue along the path while steering clear of water, and you will eventually spot another small opening for Hazel to shimmy through. A subsequent cutscene further expands on the ghostly narrative, directing her next objective to follow these apparitions across a river.
Chasing the Ghosts of the Past
")
As you explore the adjacent ruins, you’ll come across a materializable workbench from the past, which is instrumental in accessing higher platforms or constructing strand bridges. This newfound ability will unlock additional exploration opportunities, allowing the discovery of valuable resources like floofs.
Cross the bridge, encountering more Haints to defeat. After overcoming these adversaries, stay in pursuit of the ghosts leading the way, as you’ll soon unlock the Strand Push ability. This capability is essential for clearing obstacles, redirecting enemy attacks, and inflicting minor damage during confrontations.
Navigating the Ghost’s Escape Route
")
Positioned across from the ghosts, utilize the wagon to bridge the gap. Jump onto the shed for a higher vantage point, allowing you to leap across and continue along the path, which soon leads to another combat encounter. Employ your newly acquired skills to vanquish these foes and progress further.
")
After clearing the area of hostile entities, enter the wooden barn and pursue the ghosts. In this section, you’ll be introduced to the Strand Pull ability, enabling you to pull enemies and items closer, facilitating your usefulness in battle. Continue the chase, which will lead you into yet another combat arena filled with more Haints.
If you lose sight of the guiding apparitions, remember to utilize your Guiding Strand ability to locate them. Ultimately, your adventure will guide you into a cave adorned with glowing symbols upon its walls.
Follow the luminescence, marking the conclusion of Chapter 2 in South of Midnight.