

Making your way to Maluca in The First Berserker: Khazan signifies you’ve already navigated a challenging path filled with relentless war drums and fierce combat. However, brace yourself, as Maluca presents a notable increase in the difficulty level with two demanding phases. The latter phase introduces the formidable status effect known as Chaos, which can significantly impair your character if you’re unable to evade his assaults. Maluca’s attack patterns are complex and unpredictable, making it essential to be well-prepared for his relentless onslaught.
Where To Find Maluca In First Berserker: Khazan
Traverse Nadin Quarry & Complete Veiled Knives

To reach Maluca, you’ll begin your journey in the treacherous Nadin Quarry, where you’ll encounter a mix of undead foes, revenants, and hostile spiders. Situated in the Pell Los Plateau, this area is fraught with danger, including the intimidating Renowned Spellblade’s Shadow elites that wield massive Epee-style swords and can conjure lightning attacks from a distance. Defeating these elite enemies gives you a chance to acquire the Soul Piercer Spear, a valuable asset for those utilizing a spear build during mid-game.
Be wary of the multitude of Knivesveil bandits and soldiers that patrol the region; they can quickly overwhelm you if you’re not vigilant. Additionally, you must navigate through hazardous rolling ball traps, which become easier to manage once you’ve dealt with the local enemies. Ultimately, you will find yourself at the Throne of the Veil, where Maluca awaits in the arena.
How To Defeat Maluca
Utilize Reflection in Both Phases to Overcome Maluca


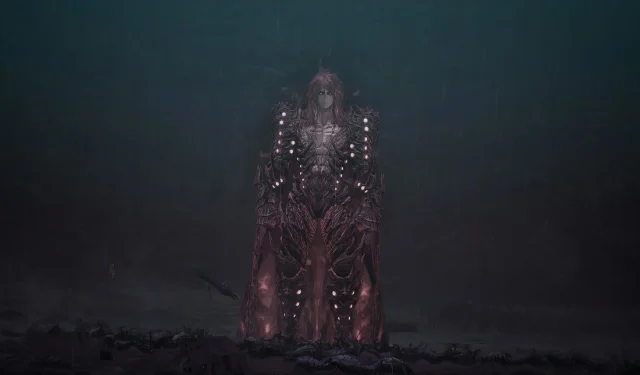
At the start of your encounter with Maluca, he will be in his human form, lacking any embedded status effects in his attacks. He initiates the battle with slow swinging attacks, offering you the perfect opportunity to practice your Reflection timing. Following an initial heavy swing, he executes a follow-up that can be easily reflected when you hone your rhythm. An additional slower attack follows if you misjudge the first.
Mastering the timing of your Reflections during both phases is vital, as successfully executing these will deplete Maluca’s stamina gauge significantly. Be attentive, as Maluca may briefly pause to beat on his chest, which can increase his health; this act can be interrupted during the first phase, so keep a spirit charge handy for a javelin throw.
Beware of Maluca’s other notable moves in the first phase, such as his charged whirlwind projectile, which can be avoided or defended against with relative ease. He also possesses unblockable attacks, followed by a kick that inflicts considerable damage. Once Maluca’s health is reduced to approximately 75%, he transitions into a more challenging second phase.
Introducing Chaos in Maluca’s Second Phase


Entering the second phase, you will encounter the Chaos status effect, which can severely affect your maximum health, stamina, and spirit if you fail to avoid its attacks. Fortunately, many of Maluca’s Chaos-infused moves can be dodged if you anticipate their timing. The initial attack in this phase features Maluca executing a ground slam followed by an explosion, which is quickly followed by a teleportation strike aimed at you.
This is your opportunity to execute a powerful heavy attack between his ground slam and the ensuing explosion, which can also be mitigated with brinks. If you fail to dodge effectively, you may quickly be overwhelmed by his Chaos attacks, potentially filling the gauge if your defenses are low. Following this initial strike, he employs an attack that forms a line of smoke and dashes towards you with his dual blades.
Keep vigilant for your chance to use Reflection in this phase, far more critical than before. Similar to his first phase, Maluca will again take a moment to beat his chest, but this time his actions inflict Chaos damage, making a charged javelin throw essential to minimize health recovery. Pay attention as he draws his greatswords intermittently, a clear sign he is about to unleash three jump slam attacks—brink dodging here is crucial.
Maluca will employ teleport dash attacks across the fight; if timed precisely as his sword flashes, you can land a Reflection that will dramatically reduce his stamina bar. Additionally, expect his whirlwind attack, now escalating to seven or eight charges consecutively as his health dwindles. The most dangerous moment comes when he crouches for a pounce, glowing sword in hand; swift brinks are necessary to evade serious damage.
Rewards for Defeating Maluca
Unlock Khazan’s Phantom Form by Overcoming Maluca

Upon successfully depleting Maluca’s health bar, a cinematic sequence unfolds, culminating in the merging of Khazan and the Blade Phantom, granting Khazan his Phantom Form. This specialized Berserker mode can be activated once your gauge is filled through defeating enemies and landing successful hits. Your Phantom Form is not only versatile but can be utilized when your health is critically low and can be upgraded within the common skills tree, enhancing its benefits.
In addition to the Phantom Form, you’ll also earn two random items from the Chaos-Ridden Set, along with a chance to acquire the Chaos Fragment, pivotal for crafting pieces of the Chaos-Ridden set at the Blacksmith located in The First Berserker: Khazan.
To conclude, Maluca represents a formidable challenge requiring a combination of skill, timing, and strategy. Mastering the techniques of Reflection and exercising patience will ultimately pave the way to victory against this tough boss.