AI Limit offers a variety of in-game tutorial options, but many mechanics aren’t explored in depth. Players will need to engage in experimentation, as understanding key elements early on can significantly impact their experience. This comprehensive guide covers essential topics, including the most beneficial stats to focus on, the locations of early weapons, and strategies for obtaining upgrade materials efficiently.
Within this guide, we will delve into the crucial aspects that you need to be aware of as you navigate through this Soulslike adventure.
Essential Stats to Focus on Early in AI Limit
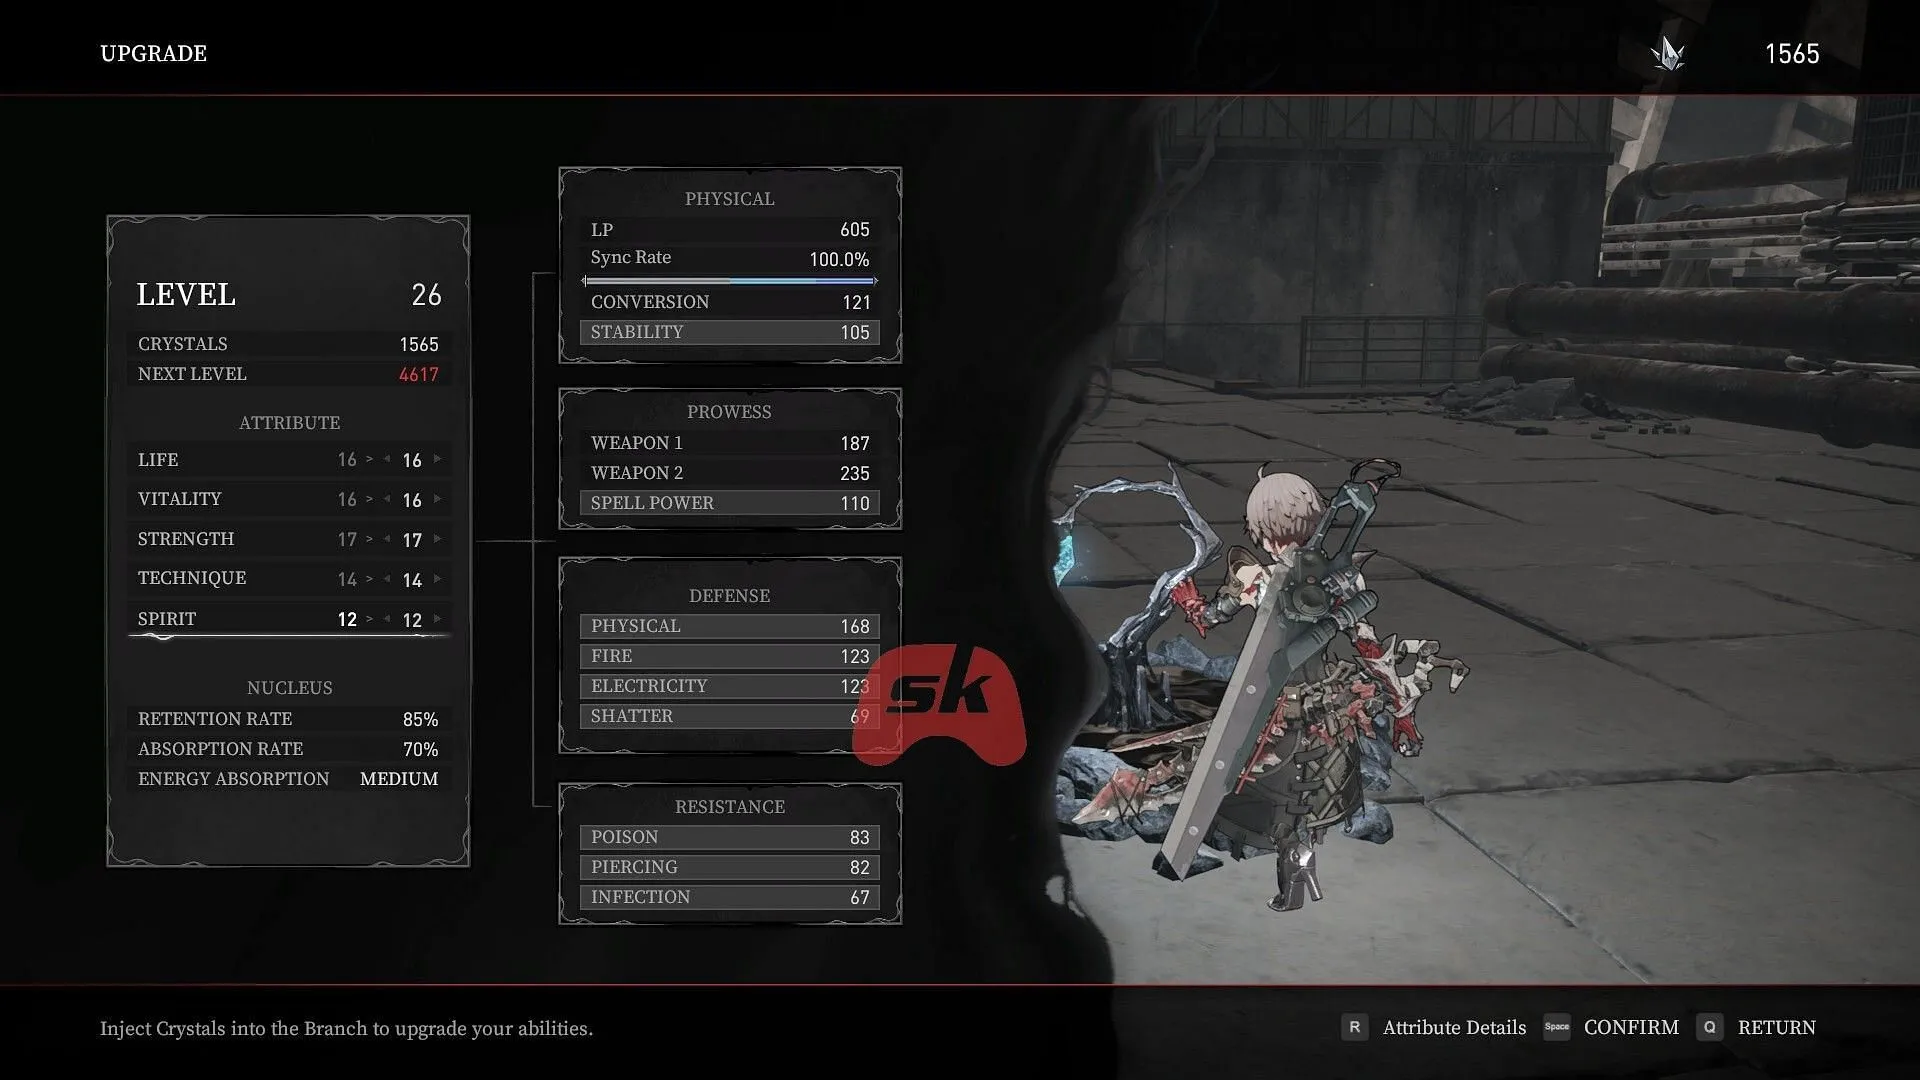
As you embark on your journey in AI Limit, prioritizing Life and Strength upgrades will set you up for success. Enhancing Life is particularly advantageous as higher HP translates into greater survivability, allowing for a more aggressive playstyle and the opportunity to learn from mistakes. Simply put, if you’re dead, you can’t attack, making Life the most effective early investment.
Following Life upgrades, Strength is critical as most powerful early weapons benefit from it. Increased Strength leads to heightened damage output, enabling quicker battles and reducing the threat from enemies.
In the early game, other stats are less impactful unless you are targeting specific weapon or spell requirements, so it’s wise to avoid investing too heavily in them at this stage.
Optimal Early-Game Weapons, Armor, and Accessories in AI Limit
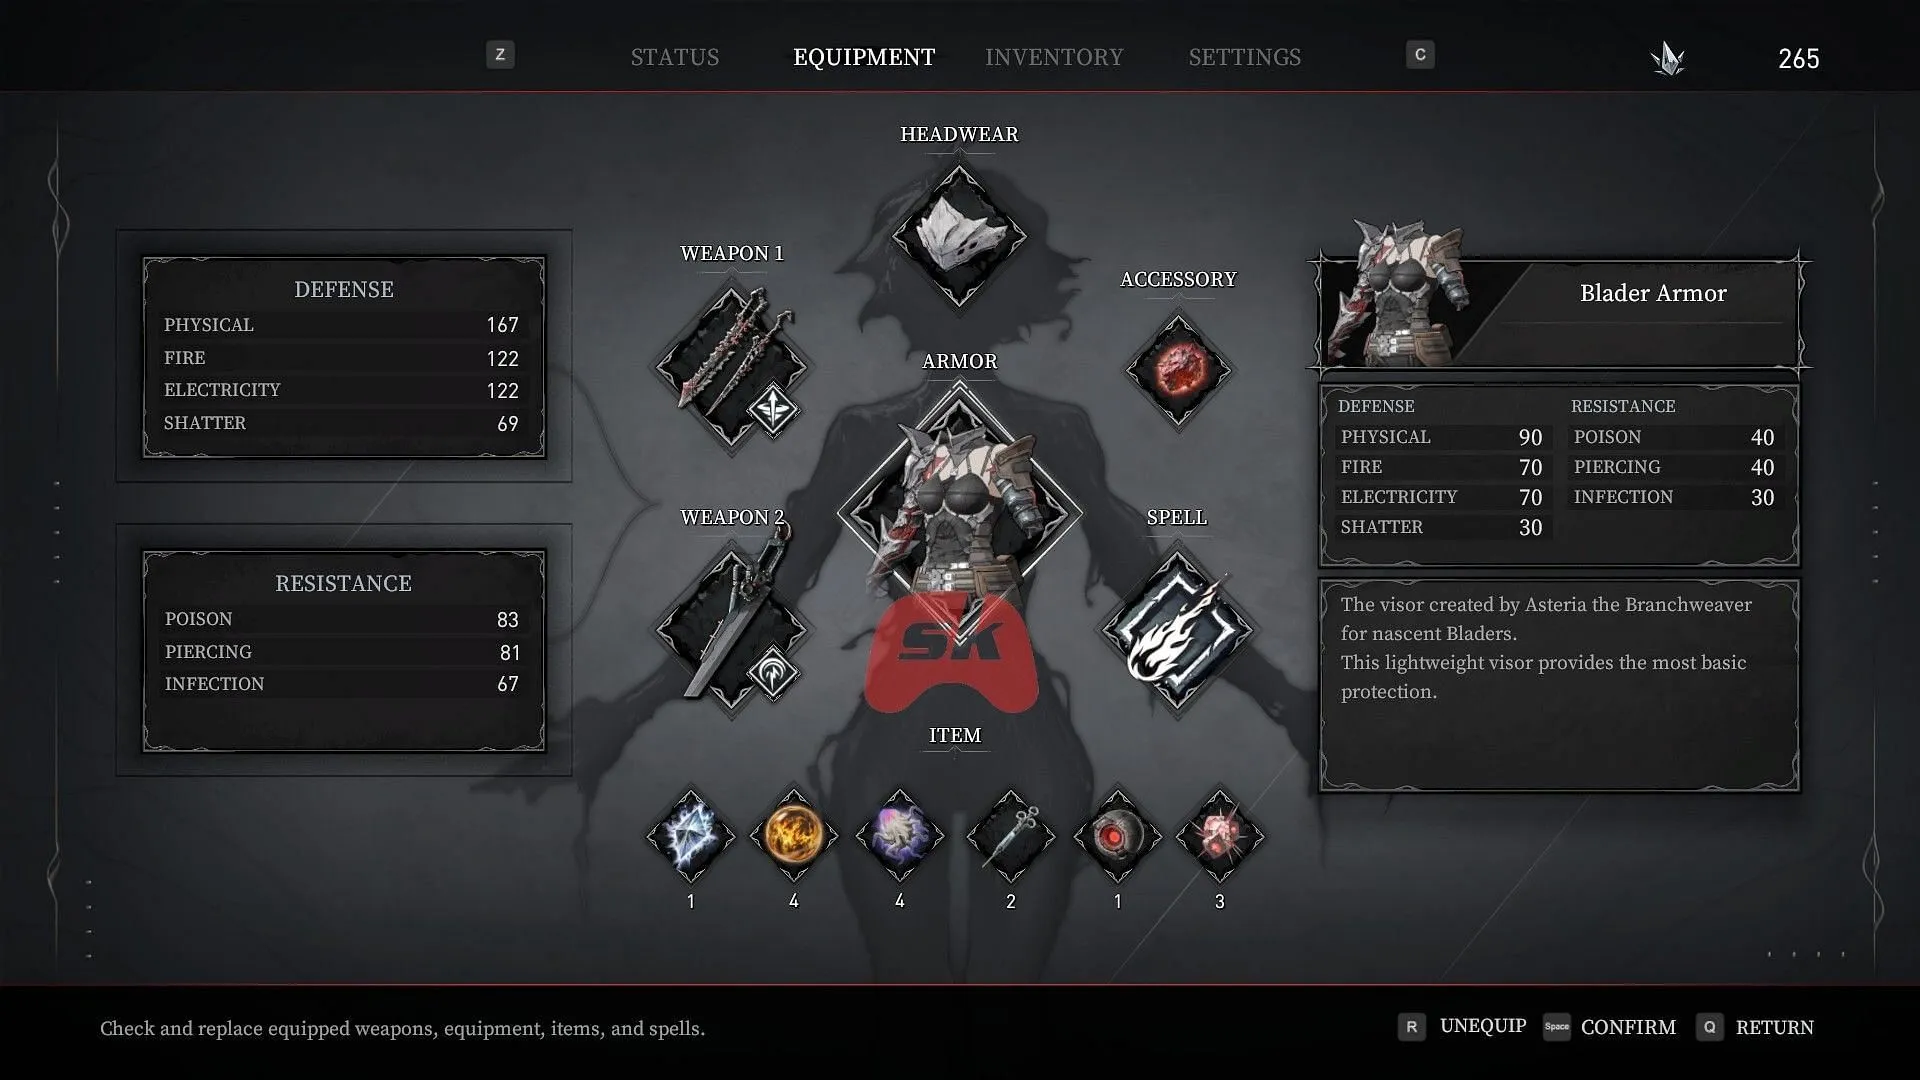
Equipping the right early-game items is crucial for ensuring both survivability and damage output in AI Limit. With a plethora of loot available, it’s essential to identify the standout items:
Top Early Weapons
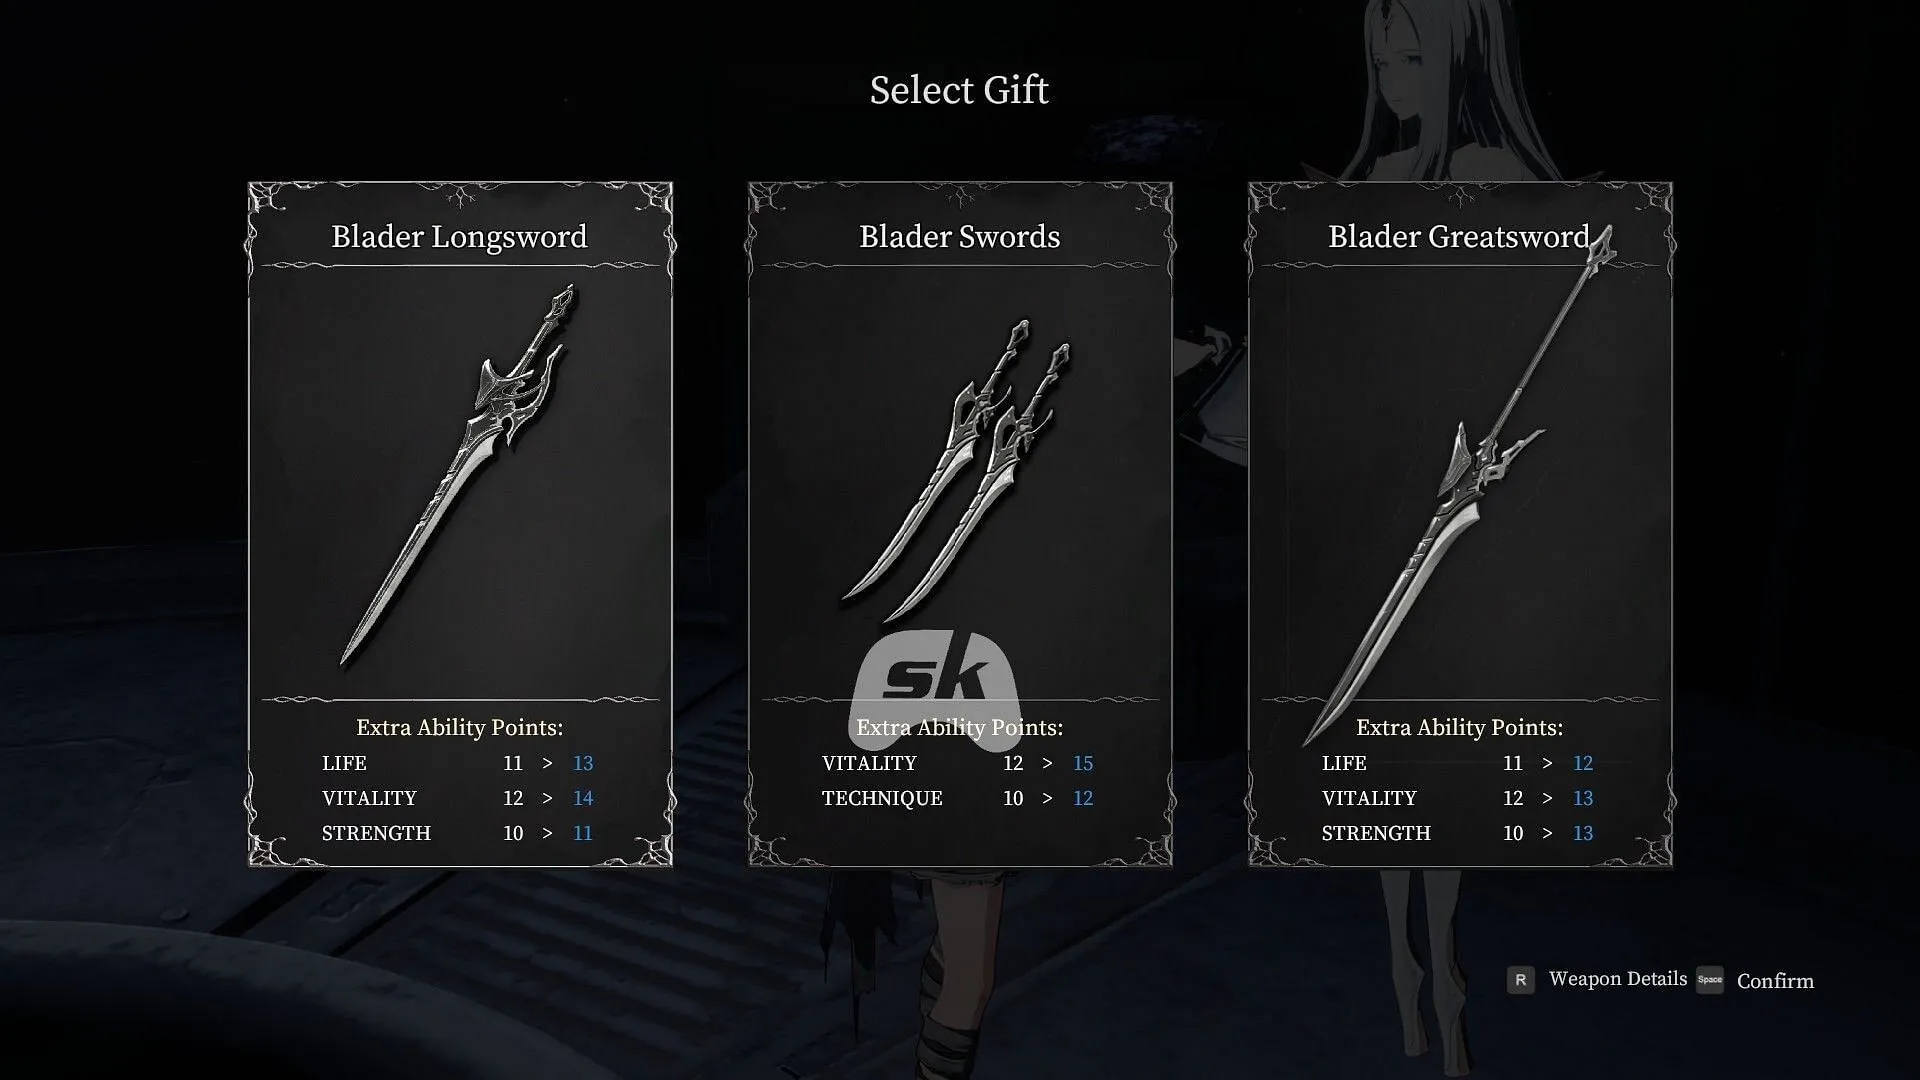
1) Blader Greatsword
- Physical Damage: 160
- Scaling: Strength (C), Technique (E)
- Requirements: 12 Strength, 10 Technique
- How to Acquire: Select it as a starter weapon at the game’s beginning.
2) Corrupted Blader Greatsword
- Physical Damage: 142
- Piercing Damage: 17
- Scaling: Strength (C), Technique (E)
- Requirements: 15 Strength, 10 Technique
- How to Acquire: Dropped by a corrupted Blader along the path between Abandoned Houses and Cemetery.
Best Early Seals
1) Metastability (Normal Seal)
- +50 Stability
- How to Acquire: Found near the Before Upward Elevator Branch in Sewer Town.
2) Hardened Skin (Normal Seal)
- +50 Physical Defense
- How to Acquire: Located next to a massive tree between the Abandoned Houses and Cemetery Branches in the Outer-Wall Ruins.
3) Seal of Pilgrim (Main Seal)
- +70 Stability
- 15% damage reduction from Poison, Piercing, and Infection
- +50 All Defense during status ailments
- How to Acquire: Speak to Shirley three times at the Temporary Campsite.
Top Early Armor
1) Iron Pot (Headwear)
- Best Stats: 50 Physical, 30 Piercing Defense
- How to Acquire: Found on a rooftop next to the Abandoned Houses Branch; kick down the ladder to access it.
2) Blader Armor (Body Armor)
- Best Stats: 90 Physical, 70 Fire, 70 Electricity Defense
- How to Acquire: Located in a safe adjacent to the Maintenance Access Branch.
3) Blader Visor (Headwear)
- Best Stats: Balanced resistances against all damage types
- How to Acquire: Found in a safe near the Maintenance Access Branch.
Traveler’s Outfit
Defense:
- Physical: 70
- Fire: 80
- Electricity: 70
- Shatter: 40
Resistance:
- Poison: 70
- Piercing: 30
- Infection: 10
How to Acquire: Check for a red valve safe, which can be elusive yet rewards valuable items; one in the sewer level contains the Traveler’s Outfit, a helpful early-game armor set.
Best Early Accessory
Turbid Nucleus
- Retention Rate: 85%
- Absorption Rate: 70%
- Energy Absorption: Medium
- How to Acquire: Defeat the Scavenger Patriarch in the area beyond the Abandoned Houses Branch within the Outer-Wall Ruins.
To minimize Crystal loss upon death, the Turbid Nucleus is invaluable. Its impressive Retention Rate ensures that you retain a greater number of Crystals, making it ideal for those focused on farming and mitigating setbacks.
Best Early Spell
Railgun
- Sync Cost: 20%
- Spirit Requirement: 10
- How to Acquire: This is the first spell unlocked in the game.
The Railgun serves as an effective ranged attack and allows players to engage enemies from a distance. Notably, it demands minimal Spirit investment, making it accessible even for non-magic-focused builds, thus proving beneficial for taking out adversaries before they close in.
How to Acquire and Switch Seals
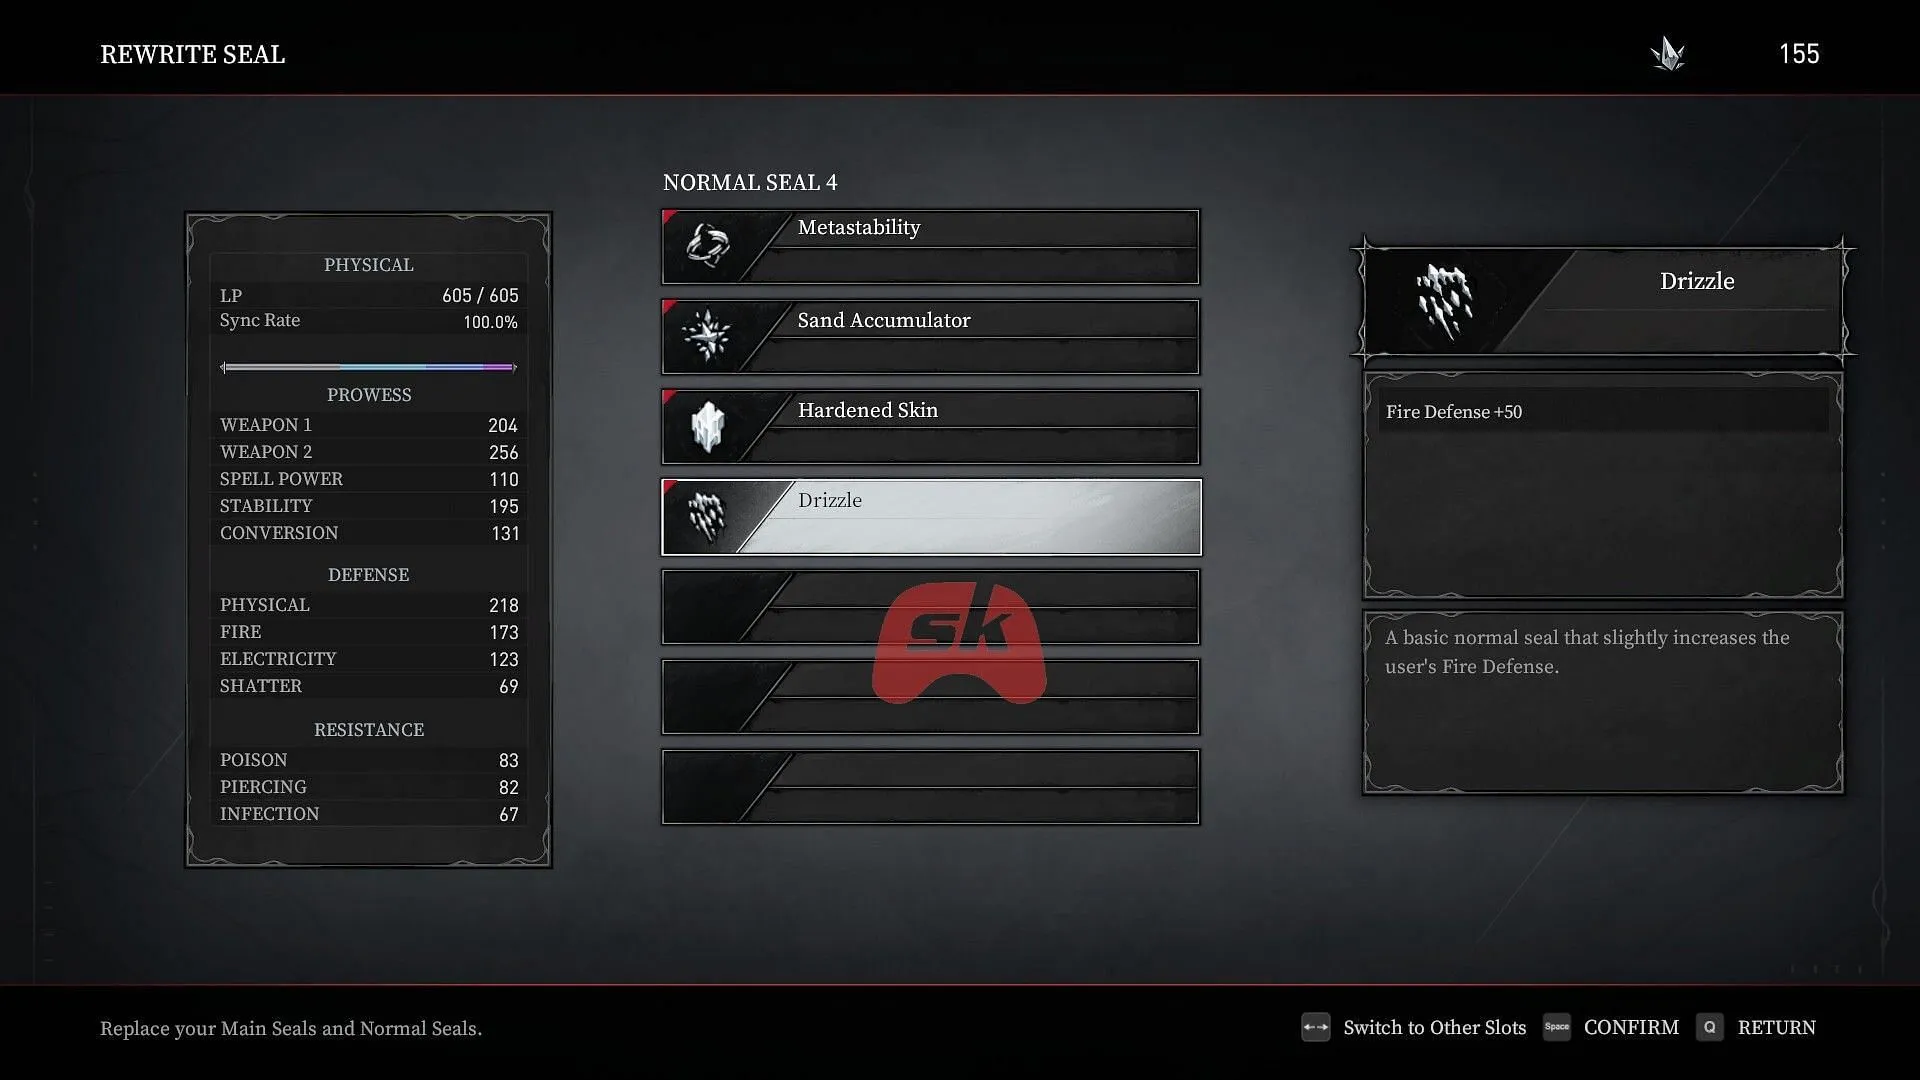
Seals provide unique buffs to enhance a Blader’s abilities in AI Limit, but the process of equipping them can be a bit tricky. If you have collected Seals but are unsure how to utilize them, it’s likely because you lack a key item. Without this item, the Seals will remain dormant in your inventory, offering no advantages.
Steps to Unlock Seals
Upon completing the initial section of the game, navigate to the Outer-Wall Ruins. Progress through this area until you reach the Abandoned Houses branch. Here, descend a couple of ladders to the right, cross the street, and enter an open house where an enemy awaits at the door. Inside, you will find the Seal Needle, a crucial item required to enable and modify your Seals. Picking it up will trigger an automatic tutorial on how the system operates.
With the Seal Needle now in your inventory, you can revisit the branch you just left and interact with it. A new option, Rewrite Seal, will appear, allowing you to equip and switch Seals at your convenience. This menu lets you designate a primary Seal for your main advantages and a secondary Seal for additional benefits.
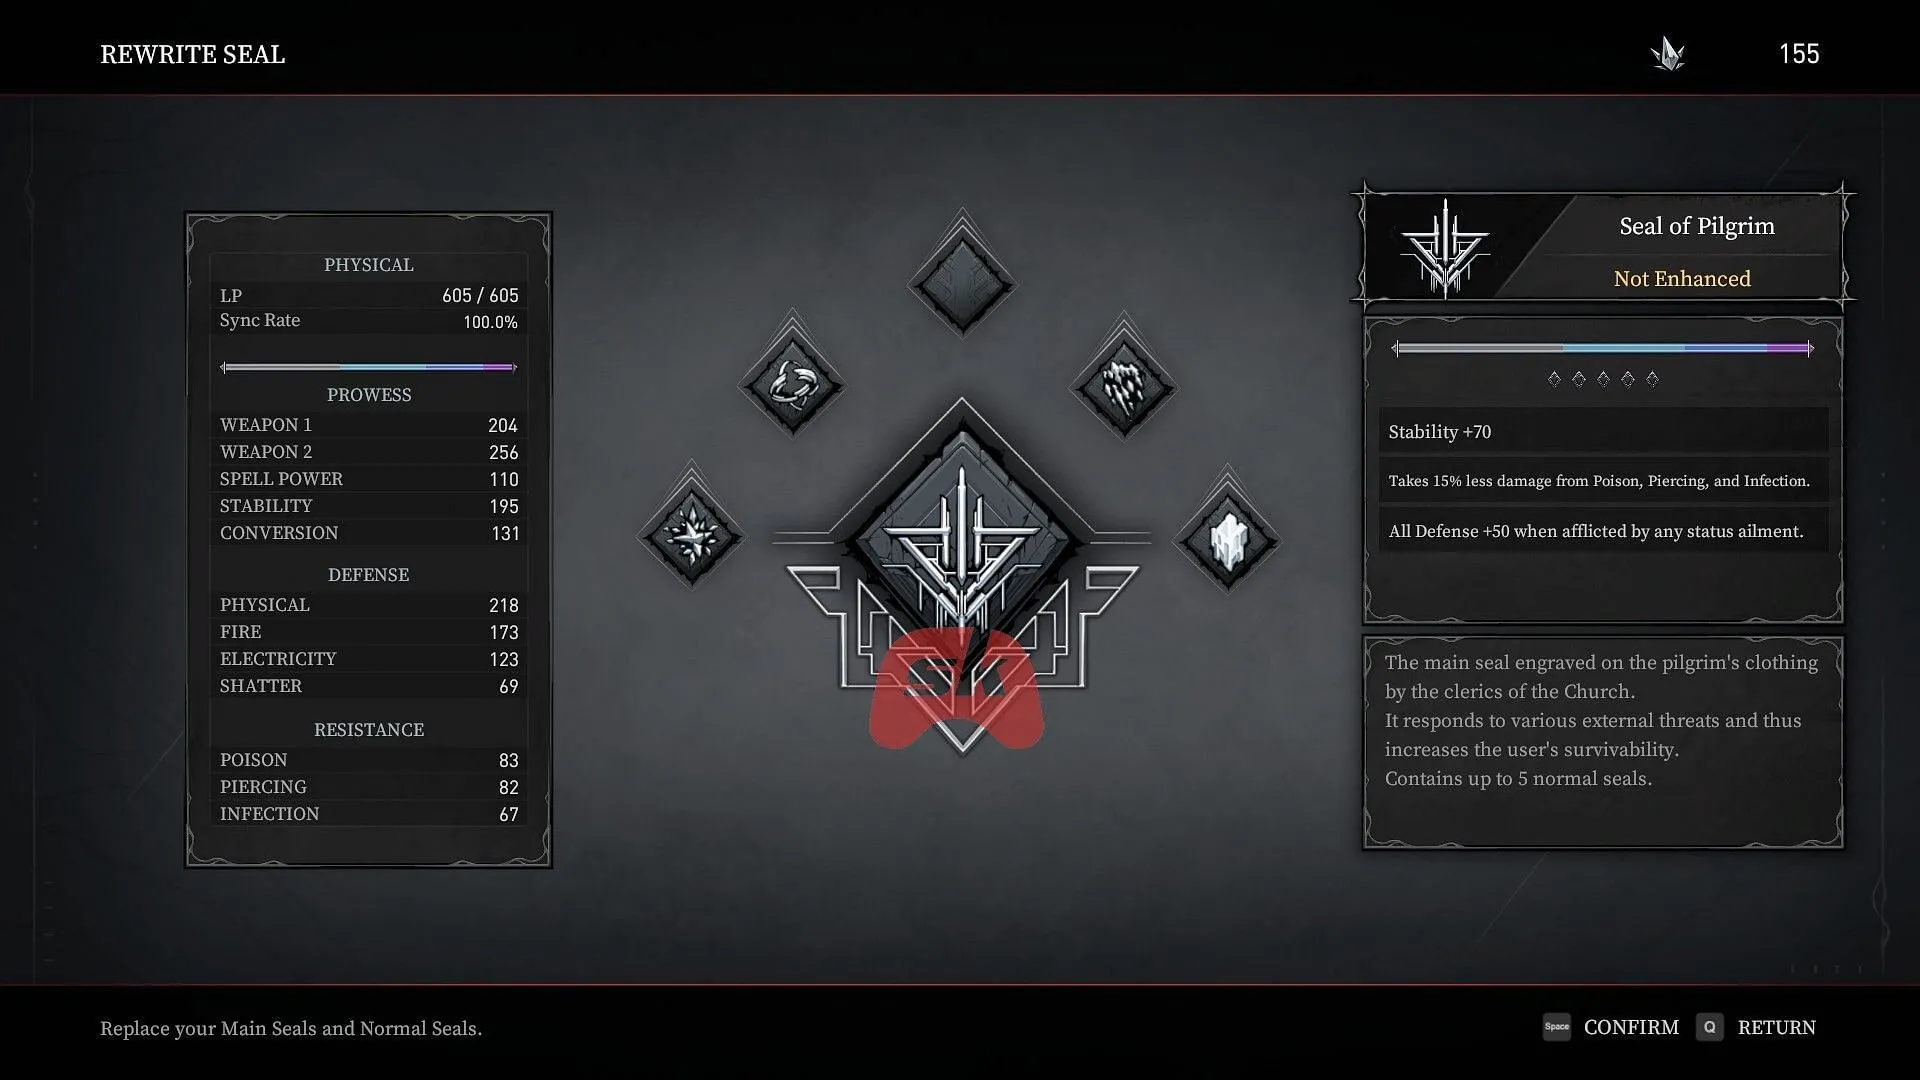
If you are seeking new Seals, they can be acquired through defeating formidable enemies, interacting with memories, exploring concealed areas, or engaging in dialogue with NPCs. Some NPCs will only provide a Seal after you have exhausted their dialogue options, so keep conversing until they begin repeating their lines.
The initial Main Seal available is the Seal of Pilgrim, obtainable by repeatedly conversing with Shirley at the Temporary Campsite. Continue selecting Talk until she ultimately provides it.
Upgrading Seals
To enhance the effects of Seals, players can opt to upgrade them. Access the Enhance option at any branch and navigate to the Seal upgrade menu using the D-Pad. Upgrades necessitate special materials that can be collected throughout the game world or purchased from specific merchants.
Increasing Life Dew Charges in AI Limit
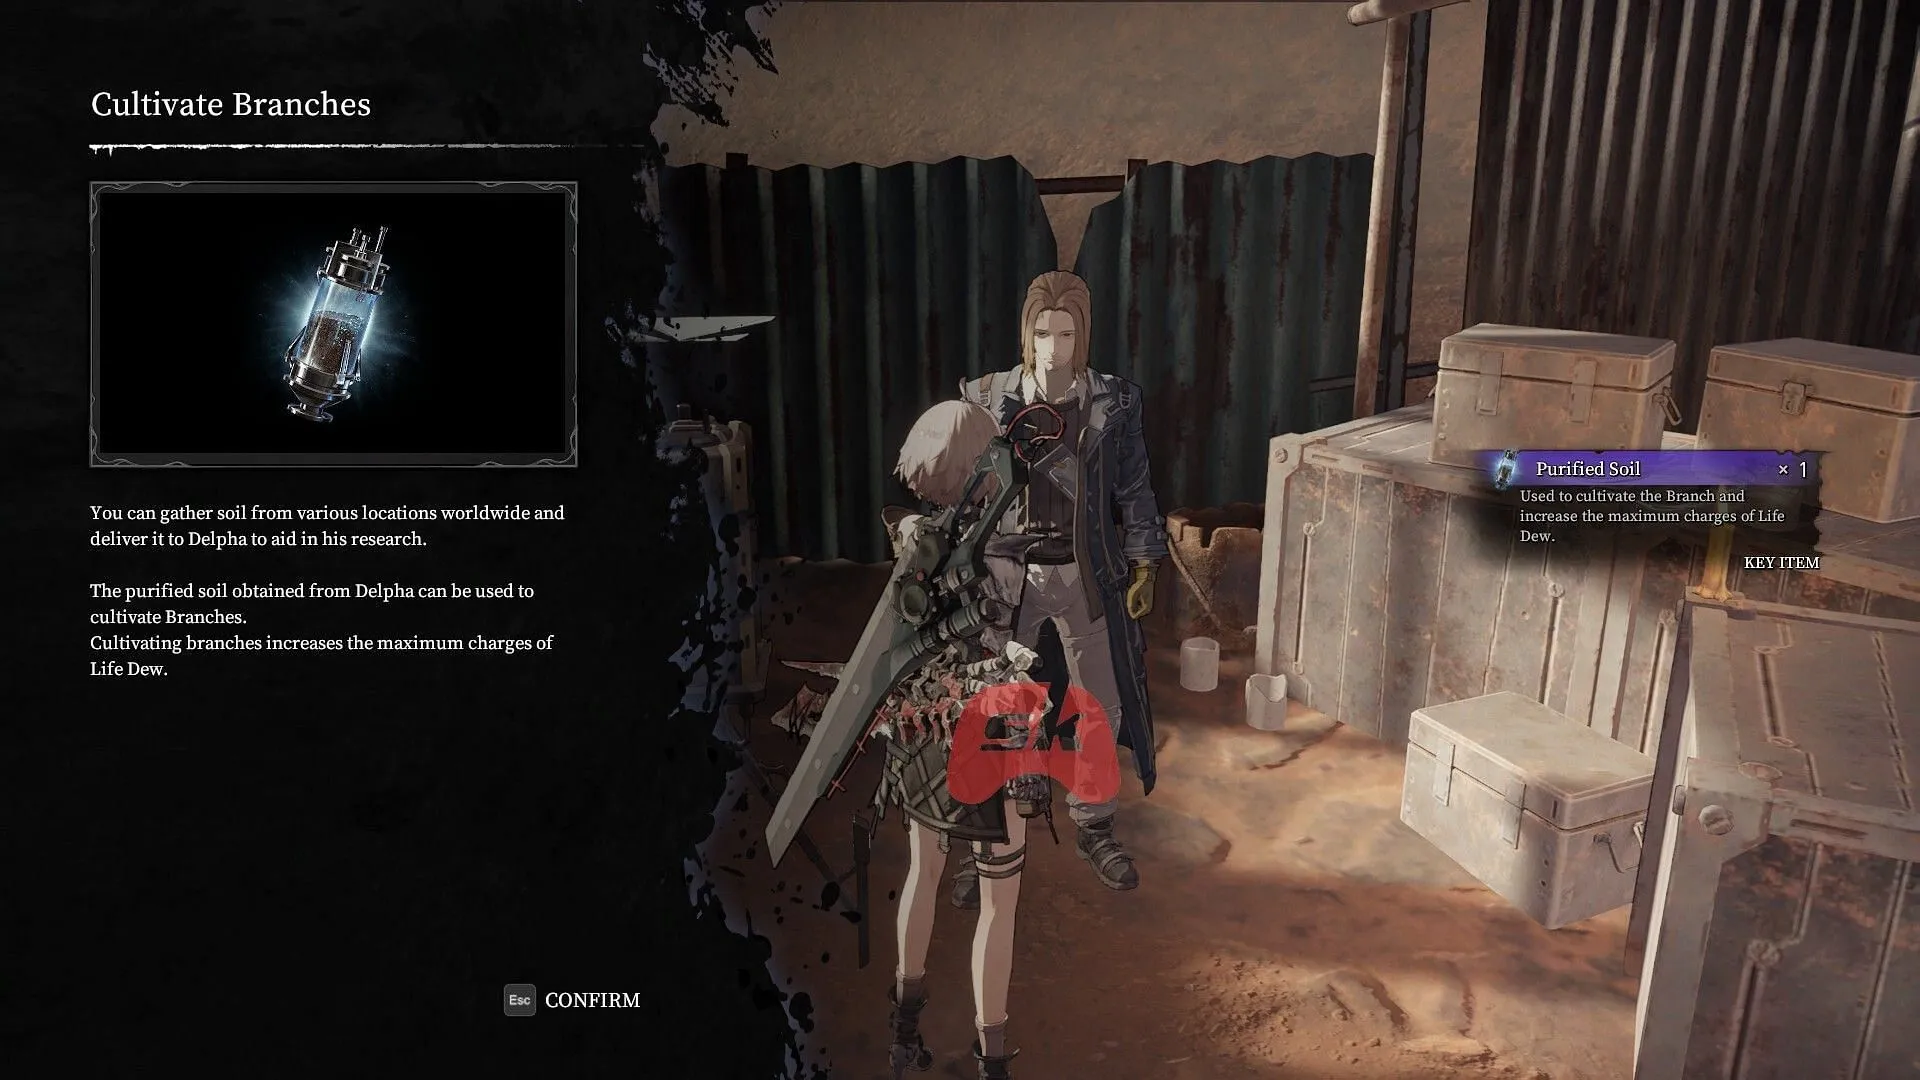
Understanding how to increase your Life Dew (Flask) charges in AI Limit is vital for maintaining your health during your adventures. While these healing items are replenished at Branches, increasing their quantity involves interacting with a specific NPC named Delpha, the Soil Researcher, and procuring a rare item known as Purified Soil.
Unlocking Your First Life Dew Upgrade
After defeating the first boss and exiting the sewers, you will find yourself in the Slums at the Temporary Campsite, where you will meet Delpha. Engage with him and exhaust his dialogue to receive one Purified Soil.
To elevate your Life Dew charges, make your way to the nearest branch and select the Cultivate Branch option to boost your healing count.
How to Obtain Additional Life Dew Upgrades
The initial upgrade process is relatively straightforward, but gaining further upgrades requires more effort. To acquire more Purified Soil, you need to:
- Gather a Soil Sample: Look for these scattered across various locations in the game world. After obtaining one, return to Delpha.
- Defeat the Necros Leader: This is the main boss encountered where you collected the Soil Sample. If you have the sample, you have likely vanquished the boss.
- Purify the Soil: Engage with Delpha until the Purify Soil option is available. Choose this to obtain another Purified Soil.
- Cultivate the Branch: Return to any Branch and use the Cultivate Branch option to increase your Life Dew count.
Repeat this process each time you find a new Soil Sample and you’ll gradually enhance your Life Dew charges, streamlining your battles significantly.
Effective Early-Game Farming Spots for Upgrade Materials in AI Limit
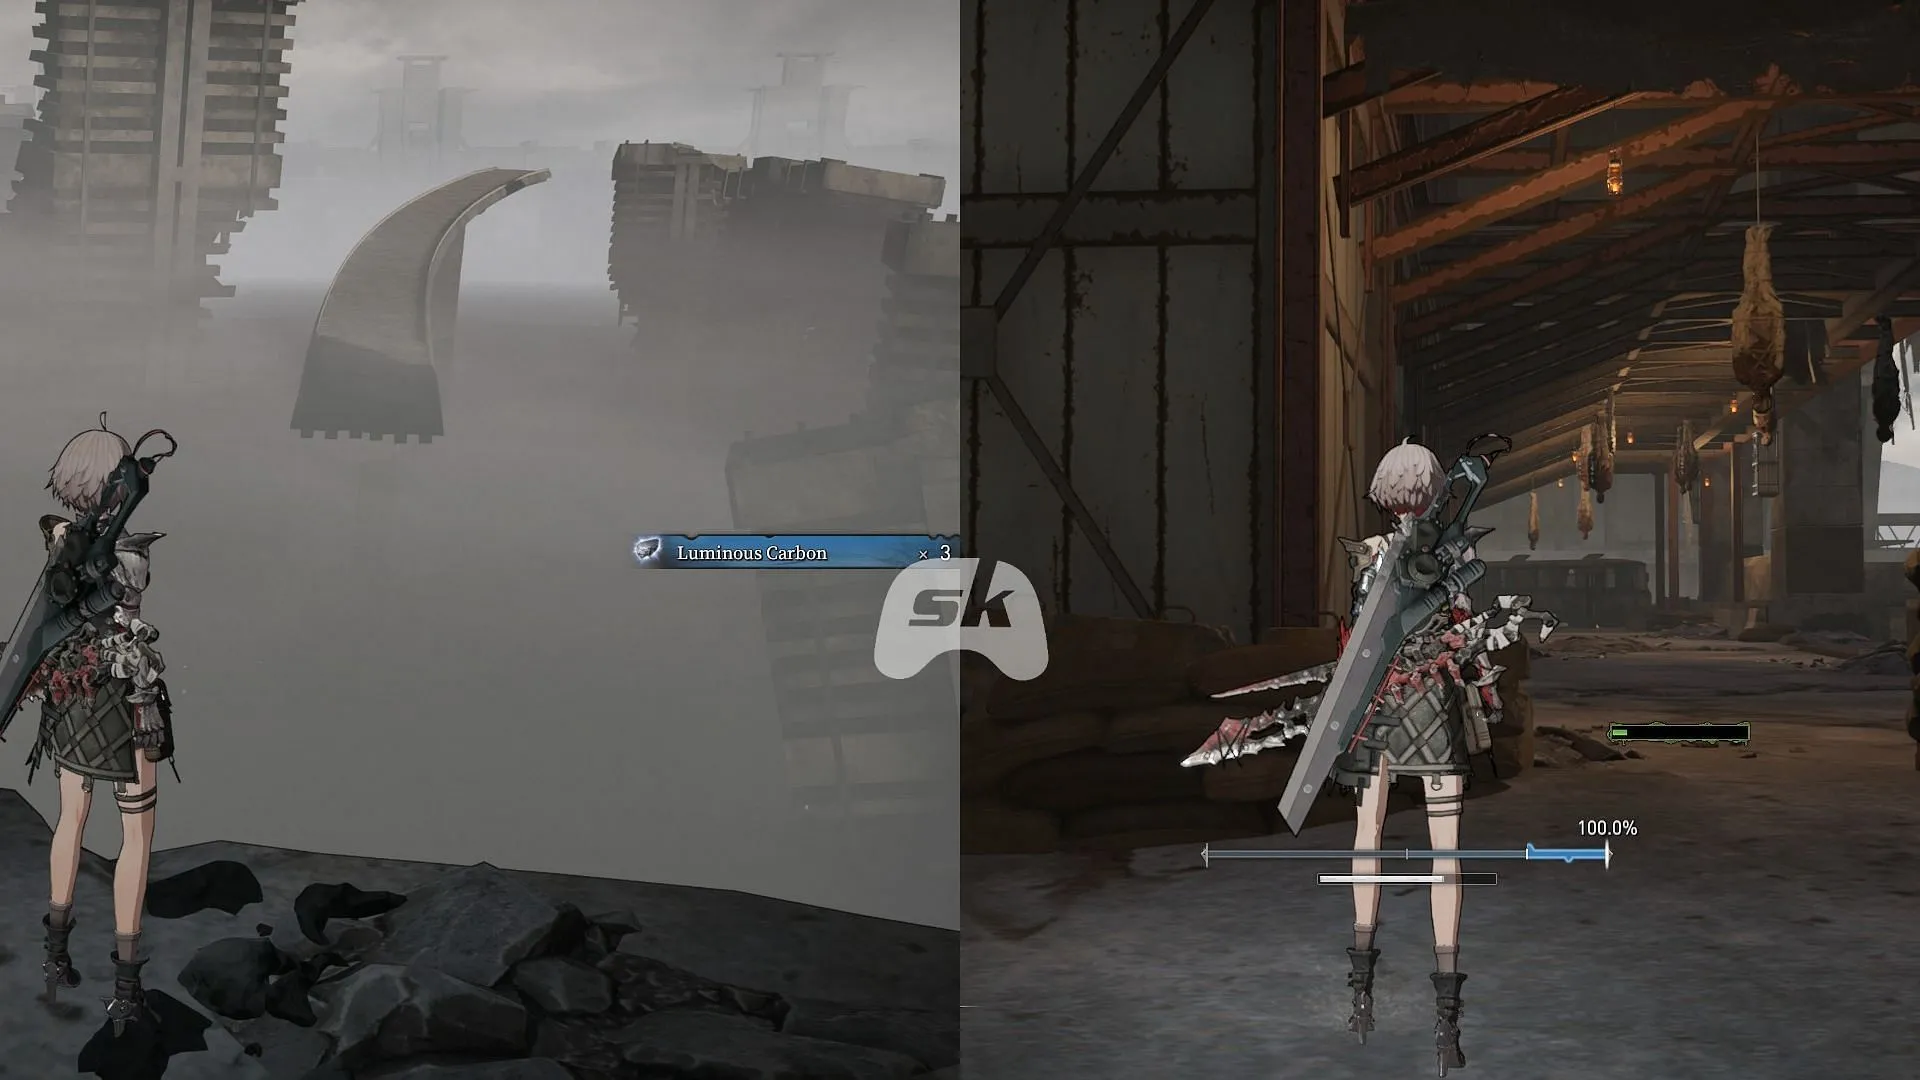
To alleviate future challenges, it’s essential to know how to farm early-game upgrade materials in AI Limit. The four key materials to seek are Luminous Carbon, Luminous Diamonds, Tiny Resonance, and Contemporary Resonance. While they can be collected as loot, the most efficient farming method is by defeating elite enemies in targeted zones.
1) Farming Luminous Carbon
Recommended Location: Sunken City Overground Boundary Bridge
- Farming Method: The enemies in this area respawn infinitely, making them ideal candidates for helping you collect Luminous Carbon early in the game.
Though Luminous Carbon is vital up to the third weapon upgrade, it can be tricky to farm. If exploration fails to yield sufficient quantities, focus on this spot for consistent drops.
2) Locating Luminous Diamonds
- Best Farming Area: Hagios Patir Upper Levels
- Alternate Source: Purchase from Merchant Kyen for 3,000 Crystals after delivering Covenant: Sewer Town.
Luminous Diamonds serve as medium-grade weapon upgrade materials accessible through both enemy drops and collectible finds. They can also be bought from Kyen at the Sunken City Overground Top Apron following the delivery of Covenant: Sewer Town, which you can locate in the Sewer Town Sedimentation Tank area control room.
3) Obtaining Tiny Resonance
- Best Farming Spot: Available from Millaire’s Spell Workshop at Temporary Campsite for 1 Adaptive Fragment.
- Alternate Source: Drops from elite enemies in mid-game areas.
Tiny Resonance is a crucial starter material for upgrading Main Seals. It becomes purchasable once Millaire appears at the Temporary Campsite after she escapes from the Hunter of Bladers’ grasp.
4) Gathering Contemporary Resonance
- Most Effective Farming Area: Hagios Patir Upper Levels
- Farming Tip: Assail elite Church enemies in this region for steady drops.
Contemporary Resonance is a Main Seal upgrade material found primarily from elite foes in later game areas. The Upper Levels of Hagios Patir are laden with these enemies, making it a prime location for farming.
Beginner Tips to Excel in AI Limit
1) Utilize Weapons with Pierce or Poison Abilities
While high-damage firearms may seem advantageous, weapons that inflict Pierce or Poison damage offer greater DPS and staggering potential. Poison effectively depletes foes’ health gradually, while Pierce weapons disrupt attack sequences, making them favorites during the early game stages.
2) Always Open Safes for Rare Gear
Keep an eye out for safes marked with a red valve and open them as soon as you can. These can be difficult to spot due to their camouflage, but they yield valuable loot. For example, one early safe in the sewer level contains the Traveler’s Outfit, providing much-needed protection in the initial phases of the game.
3) Use Mud Balls Liberally for Healing
Mud Balls serve as consumables that restore HP over time. While it may be tempting to hoard them for emergencies, they are relatively easy to acquire from enemies and scattered throughout the world. Don’t hesitate to use them during long encounters or when traveling between Branches to maintain your health.
4) Adjust Your Camera for Better Combat
The battle mechanics in AI Limit reward precise positioning. Free camera movement enhances agility and makes dodging easier. Conversely, locking in your camera allows for more accurate attacks with spells or melee combos. Mastering the switch between locked and free camera modes is key to improving your combat efficiency.
5) You Can Change Seals—Don’t Feel Limited
Your Main Seal significantly influences your playstyle, yet many players remain unaware that they can swap it out later. As you progress through the Outer-Wall Ruins, you’ll find an item enabling you to rewrite your Seals at any Branch. Don’t shy away from experimenting with new builds as you unlock different Seals.
6) Explore Thoroughly—Hidden Paths Abound
AI Limit rewards thorough exploration. Numerous secret paths and parkour sections lead to rare weapons, armor, and upgrade materials. If you encounter an area that seems suspiciously empty, it likely holds a secret. Backtracking to previously visited locales after obtaining new abilities can yield hidden treasures.
7) Spend Your Crystals Before Switching Nuclei
In AI Limit, Crystals are both a currency and a means of gaining experience. If you switch Nuclei prematurely, any unspent Crystals will be lost. Before changing your build, make sure to utilize all your Crystals at a vendor or for upgrades to maximize your resources.
8) Sell “Goods”Items—They’re Essentially Useless
Goods items that you encounter have no other purpose beyond being sold. Vendors will buy these items for additional Crystals, so offload them whenever you visit a shop to free up inventory space.
9) Engage in Repeated Conversations with NPCs
Many NPCs in AI Limit provide valuable items after multiple discussions. If an NPC is worth your time, keep the conversation going until their dialogue loops back to the start, indicating you’ve exhausted their interaction options and claimed any rewards they held.
10) Optimize Your Armor and Seals Before Boss Fights
If you’re finding a boss particularly challenging, assess the type of damage they inflict. AI Limit incorporates damage resistances; stacking Piercing Resistance against enemies with piercing attacks or Lightning Defense against lightning-inflicting bosses can dramatically improve your chances of survival. While Physical Defense is universally beneficial, matching resistances to the specific enemy attack type will yield the best results.
11) Refer to the Notepad for Gameplay Tips
AI Limit doesn’t guide players through every mechanic, as many are only outlined in the Notepad. Note that the Notepad isn’t in the standard menu; open your map (right on the D-Pad on PS5) and locate the Notepad button (Square on PS5) at the bottom-right. If you forget how a system operates, consult the Notepad first.
12) Focus Upgrades on Key Weapons and Seals
Given that upgrade materials are limited in AI Limit, it’s wise to reserve them for your most vital Seals and weapons. Investing in less critical gear can leave you underpowered later in the game; prioritize wisely.
