
In the expansive realm of Genshin Impact, the Ancient Sacred Mountain stands out as a significant landmark, steeped in lore and shrouded in quests that require time and dedication to unravel. Nestled beneath the Giant Volcano of Tollan in Natlan, this mountain is where the engaging Chronicler of the Crumbling City quest series begins, inviting players to embark on an adventure filled with mystery.
As you take your first steps into the Chronicler of the Crumbling City, your journey will start with the completion of two essential exploration quests: The Forsaken Sea of Wisdom and the Sealed Site of Sacrifice. The initial quest, The Forsaken Sea of Wisdom, leads you to the Sea of Shifting Sentience, located to the west of the Ancient Sacred Mountain. Concluding this quest unlocks a Spiritway, directing you toward the Sealed Site of Sacrifice quest location.
This guide will provide you with a comprehensive walkthrough to successfully complete the Sealed Site of Sacrifice quest in Genshin Impact.
Preceding Quest: Genshin Impact The Forsaken Sea of Wisdom quest guide
Chronicler of the Crumbling City: Sealed Site of Sacrifice Quest Walkthrough
Navigating to the Seal in the Sealed Site of Sacrifice Quest
")
Upon unlocking the Spiritway at the conclusion of The Forsaken Sea of Wisdom, you can journey towards the southern isle known as the Flame-Melding Ritual Grounds. The Spiritway will transport you right to a teleportation point; be sure to activate it before continuing your trek southward.
")
Employing a character adept at flight, such as Mavuika or Chasca, can greatly enhance your journey to the southern isle. Alternatively, you may choose to inhabit a nearby Qucusaur to facilitate your travel. Once you arrive on the island, you’ll encounter another teleportation point alongside a Tatankasaur.
By inhabiting the Tatankasaur, you can unleash its headbutt ability to break rocks, yielding a Pyroculus and a loot chest. Make your way toward the indicated area on the map, using the Tatankasaur’s charge skill to gain altitude. Look for platforms denoted with an upward arrow that will amplify your speed as you move.
")
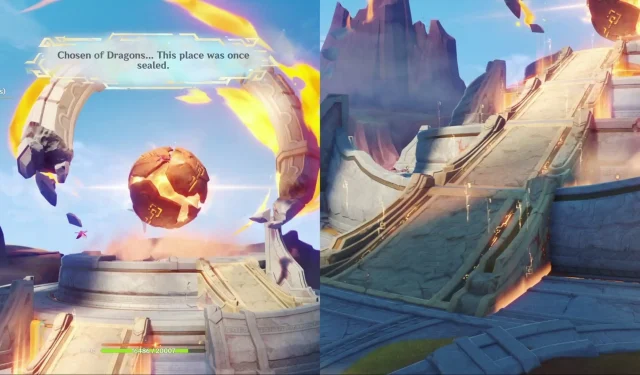
Your quest continues as you reach another teleportation point, in close proximity to an Iridescent Inscription. Approach this inscription to initiate a dialogue with the Sage of the Stolen Flame, who will guide you in breaking the seal over the Astral Assemblage.
Executing the Seal-Breaking Process in Sealed Site of Sacrifice Quest
")
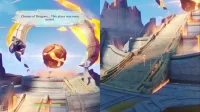
To successfully dismantle the seal, you must create a direct path leading to it while utilizing your Tatankasaur’s incredible charge ability. The stairs that guide you to the seal are scattered and need to be rearranged, which can be done by utilizing the Tatankasaur’s special charged attack against them.
- Identify the burnt red-marked spots on the stairs, striking them with the Tatankasaur’s ability to align them correctly. If positioned properly, a brilliant orange glow will signify success.
- All stairs should align effortlessly, except for the top one.
To position the top stair correctly, follow these steps:
")
- Shift it to the right side, which will break down a nearby wall and unveil a hidden room.
- Enter this room and activate a lever to retract the floor.
- Utilize the Tatankasaur’s charge ability to speed ahead and find another lever to halt the movement of the floor.
- Nearby this lever, a breakable wall is present; charge through it to make an exit.
- Conclude the staircase by striking the left-side stair twice to finalize its position.
")
Now, at the bottom of the staircase, unleash the Tatankasaur or a Collective of Plenty character like Varesa towards the seal, using a headbutt to shatter it.
")
With the seal broken, activate the Astral Assemblage to trigger a cutscene, signifying the successful completion of the Sealed Site of Sacrifice quest in Genshin Impact. Players will be rewarded with a Luxurious chest and two Exquisite Chests for their efforts, marking a fruitful conclusion to their adventure.