

The Mosaic of Memories is a captivating segment of The Hollow, which represents the seventh chapter in the acclaimed video game, Split Fiction. This chapter plunges players into the depths of Zoe’s subconscious, where she and her companion, Mio, embark on a journey to unravel the mysteries of Zoe’s childhood. Their adventure kicks off after the events titled An Ominous Welcome, wherein they encounter two new friends who provide them with unique abilities essential for navigating the challenging world ahead.
This comprehensive guide is designed to equip you with essential strategies to complete the Mosaic of Memories with efficiency and skill in Split Fiction.
Mosaic of Memories Walkthrough
In this intricate level, players must adeptly maneuver through various environmental obstacles that demand exact timing, teamwork, and the strategic deployment of Zoe and Mio’s newfound abilities.
New Abilities Overview
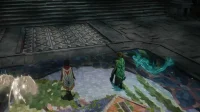
- Zoe’s Ability: Zoe acquires a mysterious green, spirit-like fish that bestows upon her the vortex pull ability, allowing her to draw in gold objects akin to a magnet.
- Mio’s Ability: Mia receives a flying golden spirit bird that provides her with the power to illuminate golden objects, like chandeliers, and construct solid light paths.
To start your adventure, jump through the gaps and employ Zoe’s vortex pull to draw a pillar towards you. Both characters should stand on the pillar, and when the pull is released, they will be hoisted upwards as the pillar returns to its original position. Mio can then activate her illumination power, allowing both characters to leap onto the nearby chandelier.
")
Next, Zoe should leverage her pull ability on the higher ground to elevate the chandelier, lifting both characters to an upper area.
Traversing Light Pathways
Move outside the tower, where beams of light filtering through the windows create traversable pathways. Jump across these beams to progress to the next section. A fallen wooden log connects two fragmented structures — carefully cross it to proceed further.
")
Utilize grappling hooks to navigate the next area until you arrive at a large chain holding a burning brazier. Ascend onto it to reach the next platform.
Solving the Rotating Tower Puzzle
")
Continue your journey by jumping through gaps until you encounter a rotating tower. Mio should illuminate the chandelier located inside while Zoe uses her magnetic ability to attach it to the wall. This interaction modifies the light rays, creating a moving pathway akin to those encountered earlier. Quickly jump onto these rays to access the next section.
Engaging with the Rotating Wheel Puzzle
Head through the right-hand entrance and look up to spot a chandelier. Mio should illuminate it, while Zoe interacts with a nearby wheel mechanism. Using Zoe’s pull ability on the middle flat surface will reverse the wheel’s rotation, bringing the chandelier down.
")
Afterwards, use Zoe’s ability on the elevated flat surface to spin the wheel again, elevating the chandelier so you can access it to elevate to the next area.
Tackling the Broken Statue Puzzle
")
Both characters will discover a broken statue head in two parts. Zoe must utilize her vortex pull to connect these halves. Stand on the right broken section and release the pull to return the fragments to their original position. Next, climb onto the chain to advance.
Illuminate the chandelier ahead, which moves constantly, so time your jumps perfectly to land on it and dash toward the next platform. Next, use Zoe’s magnetic pull to breach the adjacent door. Move left, employing grappling hooks and wall-running to conquer the following challenges.
In the upcoming area, Mio should illuminate another chandelier, creating a light ray above. Following that, Zoe can use her ability to pull it downward. Climb onto it and release, which will allow it to rise and elevate both characters to the next area.
Completing Elevator and Mirror Puzzles
- In this section, engage with a wheel mechanism to control a platform lift. Start by activating the light ray using Mio’s ability.
- Zoe should then employ her magnetic power on the flat surface on the right to adjust the light’s trajectory.
- Next, ascend onto the platform through the ray of light and deactivate Zoe’s ability, setting the light position back and activating the lift.
- Cross the wooden logs to keep progressing.
As you advance, you will come across a mirror puzzle:
")
- Shine light on the source and use Zoe’s pull to redirect it to a mirror on the left wall.
- The reflection will generate a new light ray — climb this to reach the source beam.
- Release Zoe’s pull from the left wall and employ it on the right wall to redirect the light again.
- Finally, climb the new reflected beam to move forward to the next section.
Navigating Through Floating Orbs
- Utilize grappling hooks to transition through the next segment.
- Illuminate a chandelier to form a vertical wall of light.
- Zoe should then pull the chandelier closer, facilitating a wall-run along the vertical light floor.
In the subsequent area, activating the chandelier will invoke floating light orbs. You must leap between these orbs to ascend further.
")
Later in your journey, another chandelier will create constellation-like connected light paths. Walk along these luminous pathways to continue your mission.
Unlocking the Massive Door
Close to the end, you will discover a large door accompanied by an elevated chandelier.
- Use Zoe’s magnetic ability to attach the chandelier to the door.
- Mio should illuminate it, triggering the door mechanism and unveiling the next path.
A brief cutscene will follow.
After the cutscene, make haste down the pathway inside the tower, where a massive snake monster will appear, causing both characters to tumble, signaling the conclusion of the Mosaic of Memories mission.