

Baldur’s Gate 3 is rich with diverse battles and formidable bosses that challenge players’ strategic thinking and combat skills. However, the abundance of encounters can lead to many of these thrilling fights going unnoticed, particularly for those who prefer a more cautious or linear approach to exploration.
While some combat scenarios are designed to provide significant narrative context—such as those encountered during companions’ personal quests—others are shaped purely by the choices players make and the areas they decide to explore. This structure might leave many players feeling as though they have missed out on various experiences, especially during their initial playthrough.
10 Last Light Inn: A Surprising Challenge Awaits
The Inn Overrun by Shadows

In Act 2, one of the critical locations introduced is the Last Light Inn, where players meet Isobel, an essential character who grants buffs needed to traverse the perilous Shadow Cursed Lands. Unfortunately, players who harbor darker tendencies can choose to eliminate Isobel instead of saving her, resulting in her body being taken and the protective barrier around the inn collapsing.
This choice triggers a unique encounter, transforming the patrons of the inn (excluding Jaheira) into shadow-cursed zombies, effectively trapping the player’s party. Initially, Isobel was prone to falling during rescue attempts, causing players to accidentally activate this intense battle early on. Following updates, this encounter became one of the most challenging fights in Act 2, displaying a steep difficulty spike compared to the earlier battles.
9 Discover Grym: The Hidden Boss
The Adamantine Forge Awaits Exploration

Hidden deep within Act 1’s Underdark lies Grym, a challenging boss guarding the Adamantine Forge. This location is often overlooked as players tend to stick to more recognizable routes. Although there are hints leading to the forge, many players may feel underprepared for the fight with Grym, who only takes damage when ‘Superheated’—a state he enters by walking over lava.
Defeating Grym is exceptionally rewarding, granting access to the ability to forge powerful adamantine equipment, alongside unique loot dropped by the boss itself. Players can utilize the arena’s environment to their advantage, making this encounter less daunting than it initially appears.
8 The Well-Hidden Owlbear Fight
The Enigmatic Owlbear Cave

Players may pass blithely by the Owlbear Cave in Act 1’s forest, missing out on the opportunity to engage in combat with the Owlbear Mother and her cub. Should players enter, they will face a memorable battle, especially in Honour Mode, where the mother owl will summon her mate, elevating the challenge.
7 A Massive Struggle: The Githyanki Crèche
The Crèche Amidst the Mountains

In Baldur’s Gate 3, players often choose the Underdark over the Mountain Pass during their journey. As a result, many may overlook the Githyanki Crèche, a location packed with intriguing boss battles and loot, including a potential legendary weapon. This area provides deep lore connections to the main antagonist, further enriching the gameplay experience.
6 The Devil’s Fee: A Staunch Guardian
Helsik and Her Gilded Minions

In Act 3, players may discover the Devil’s Fee while navigating the lower city, especially if they engage in dialogue with Raphael. This location serves as the gateway to the House of Hope, where players encounter the formidable Helsik, who requires either a hefty bribe or a tactical fight to progress. She proves to be a challenging encounter, summoning gilded imps and minotaurs to assist her in battle.
5 The Druids of the Grove
Conflict Between Druids and Tieflings

The ongoing conflict between druids and tieflings becomes a focal point in the game, often addressed by attacking the goblin camp or exposing Kargha. Yet, less-explored alternatives exist. For instance, by stealing the Idol of Silvanus, players can trigger a confrontation where druids will attack the tieflings, leading to a unique battle scenario that requires players to both defend the tieflings and defeat druids simultaneously.
4 The Phase Spider Matriarch: Guardian of Secrets
The Hidden Spider of Act 1

Within the depths of Act 1’s Blighted Village lies the Phase Spider Matriarch, a challenging opponent, especially for those unprepared for her webbing mechanics. While defeating her does not yield loot directly, she guards the vital dark amethyst needed to access the powerful book, the Necromancy of Thay. This book is crucial for summoning abilities that can significantly aid players in late-game encounters.
3 The Thorm Siblings: Unique Loot and Battles
The Offspring of Ketheric Thorm

In Act 2’s Shadow Cursed Lands, players will encounter the Thorm siblings: Malus, Thisobald, and Gerringothe, each presenting unique combat challenges and loot opportunities. While defeating them can be straightforward through dialogue checks and negotiation, those seeking confrontation will find themselves faced with robust battles, yielding valuable rewards upon their defeat.
2 Ansur: The Legendary Dragon
Helping the Emperor Confront Ansur

Among the various potential encounters in Act 3, the battle with Ansur, a legendary dragon, is often missed. Players must navigate challenges and find hidden passageways before they can confront this formidable foe. The fight is rewarding, especially for melee fighters, providing legendary loot such as a great sword, making the risk of facing Ansur worth the effort.
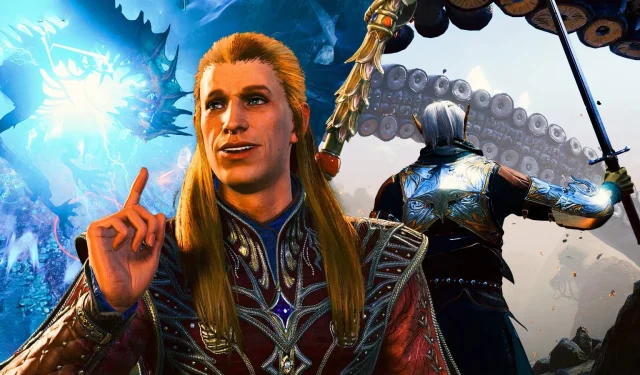
1 Raphael: A Recognizable Yet Unfought Foe
Exiting the House of Hope

Players are introduced to Raphael early in Act 1 and encounter him multiple times throughout their journey. However, it isn’t until Act 3 that they can engage him in combat within the House of Hope. Despite being a significant challenge with high stakes, many players opt to forgo this encounter for simplicity in Act 3. Nevertheless, defeating Raphael can yield incredible loot, particularly if prior actions in the game have helped strengthen the player’s position in this battle.